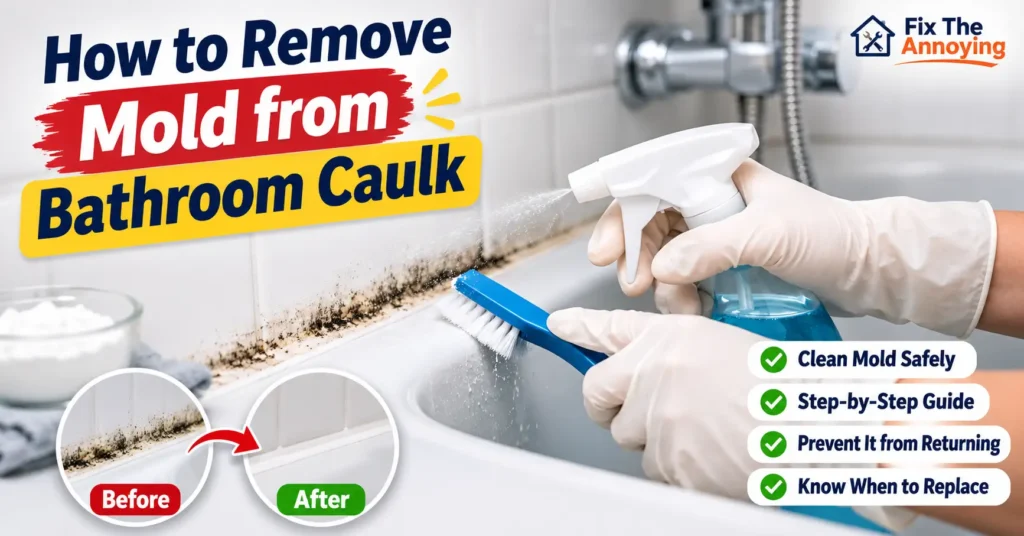
Black spots along bathroom caulk can make an otherwise clean bathroom look dirty and neglected. You may notice dark stains around your bathtub, shower corners, sink edges, or the silicone sealant between bathroom surfaces. These marks can be frustrating, especially when they keep returning after ordinary cleaning.
If you are wondering how to remove mold from bathroom caulk, the right approach depends on the type of sealant, the extent of the discoloration, and whether the mold is only on the surface or has affected the material underneath.
Bathroom caulk is regularly exposed to water, humidity, soap residue, and everyday dirt. When these conditions persist, mold can develop along the sealant. In some cases, suitable cleaning products can remove surface growth. However, deeply stained, damaged, or contaminated silicone may need to be removed and replaced.
In this guide, you will learn how to identify mold on bathroom caulk, choose suitable cleaning methods, clean shower and bathtub sealant safely, prevent mold from returning, and recognize when replacement is necessary.
What Is Bathroom Caulk and Why Is It Used?
Bathroom caulk is a flexible sealing material used to close small gaps between surfaces. It is commonly applied around bathtubs, showers, bathroom sinks, countertops, and plumbing fixtures.
Its primary purpose is to help prevent water from entering gaps where it could damage surrounding materials.
Why Is Caulk Important in Bathrooms?
Bathroom caulk provides several benefits:
- Seals gaps: It closes spaces between tubs, sinks, walls, and other surfaces.
- Helps control water penetration: Properly installed sealant reduces the risk of water entering joints.
- Allows movement: Flexible sealants can accommodate small movements between connected surfaces.
- Creates a neat finish: Caulk gives bathroom joints a clean and finished appearance.
- Protects surrounding materials: Maintaining intact sealant helps reduce moisture-related damage.
However, bathroom caulk is not maintenance-free. Water exposure, aging, cleaning products, and poor installation can cause it to deteriorate.
Caulk vs. Grout: What Is the Difference?
Caulk and grout serve different purposes.
Caulk is flexible and is commonly used at changes of plane, such as where a bathtub meets a wall. Grout is generally used to fill spaces between tiles.
Because their materials and applications differ, they require different maintenance and repair methods. Do not automatically use a grout cleaner or grout-repair product on silicone caulk.
Why Does Mold Grow on Bathroom Caulk?
Mold develops when moisture and suitable growing conditions are present. Bathrooms provide an environment where these conditions can occur regularly.
Common causes include:
- Persistent moisture: Water remains on sealant after showers or baths.
- High humidity: Warm, humid air slows the drying of bathroom surfaces.
- Poor ventilation: Inadequate air circulation allows moisture to remain.
- Soap and shampoo residue: Product buildup can collect along caulk joints.
- Body oils and dirt: Everyday bathroom use leaves residue on surfaces.
- Water trapped around joints: Narrow gaps may remain damp for extended periods.
- Inadequate drying: Wet sealant is not given enough time to dry between uses.
- Old or damaged caulk: Cracks and separated edges can allow water to enter.
- Plumbing leaks: Hidden leaks can create persistent moisture behind bathroom surfaces.
Why Does Silicone Caulk Develop Black Spots?
Silicone caulk is commonly used in showers and around bathtubs because it is flexible and water-resistant.
However, water-resistant does not mean completely mold-proof.
Soap residue, moisture, and dirt can accumulate on the surface. Mold can develop on or around the sealant when conditions are suitable. Discoloration may also remain after cleaning if staining has penetrated the material or contamination exists beneath it.
If black marks repeatedly appear in the same location, inspect the joint for deterioration or moisture problems.
How to Identify Mold on Bathroom Caulk
Dark marks on bathroom sealant are not always mold. They may also be caused by dirt, soap residue, mineral deposits, or permanent discoloration.
Common signs that may indicate mold include:

- Small black or dark spots.
- Irregular grey or greenish patches.
- Discoloration along shower corners.
- Dark marks around bathtub edges.
- Repeated staining in damp areas.
- Musty odors near affected surfaces.
Mold vs. Mildew vs. Dirt vs. Permanent Stains
These conditions can look similar, so appearance alone cannot always identify the cause.
Surface mold: May appear as scattered spots or irregular patches on damp sealant.
Mildew: A common term for certain surface fungal growths, often associated with damp environments.
Soap residue: Usually appears as a dull, cloudy, or sticky film.
Ordinary dirt: May collect along edges and joints and can often be removed with ordinary surface cleaning.
Mineral deposits: Hard-water minerals may create pale, chalky marks.
Permanent staining: Silicone may remain discolored even after visible surface growth has been removed.
Contamination beneath sealant: Dark marks may appear to come from beneath deteriorated or poorly bonded caulk.
Do not identify a mold species based on its colour. If visible growth is present, concentrate on safe removal and correcting the moisture source.
Different Types of Bathroom Caulk and Their Cleaning Requirements
Before choosing a cleaning product, identify the material used in your bathroom.
Silicone Caulk
Silicone caulk is frequently used around showers, bathtubs, and sinks.
Its main characteristics include:
- Flexible sealing performance.
- Good water resistance.
- Suitability for many wet-area applications.
- Resistance to cracking under normal movement when correctly installed.
However, not every cleaning product is suitable for every silicone formulation.
Use products approved by the sealant manufacturer. Avoid aggressive scrubbing and check whether the product is compatible with the surrounding surface.
If dark staining remains embedded in the silicone, replacement may be more effective than repeated cleaning.
Acrylic Latex Caulk
Acrylic latex caulk is often used for interior joints and areas that do not experience continuous water exposure.
Compared with silicone, it generally has different flexibility and water-resistance properties.
Some acrylic latex products are paintable, while others are specifically formulated for bathrooms.
Always check the product specifications before cleaning. Do not assume that a cleaner suitable for silicone is also appropriate for acrylic sealant.
Mold-Resistant Bathroom Caulk
Mold-resistant caulk contains additives designed to help resist mold growth.
It can be useful for suitable bathroom applications, especially around showers and bathtubs.
However, mold-resistant does not mean mold-proof.
Persistent moisture, soap residue, inadequate ventilation, damaged sealant, and poor maintenance can still contribute to mold growth.
Even mold-resistant caulk needs regular inspection and appropriate cleaning.
What You Need to Remove Mold from Bathroom Caulk
Gather the necessary supplies before starting.
| Cleaning supply | Purpose |
|---|---|
| Suitable commercial bathroom mold cleaner | Treats compatible mold-affected surfaces |
| Mild dish soap | Removes everyday dirt and residue |
| Warm water | Helps with routine surface cleaning |
| Soft-bristled brush | Loosens surface buildup |
| Non-abrasive sponge | Gentle cleaning |
| Microfiber cloth | Wiping and drying |
| Clean water | Removing residue when instructed |
| Protective gloves | Protects skin |
| Protective eyewear | Helps protect eyes from splashes |
| Spray bottle | Only when the product label permits transferring or spraying |
Do not assume every cleaning ingredient is suitable for every surface.
Natural stone, coloured grout, acrylic fixtures, and some sealants may be damaged by certain products.
How to Remove Mold from Bathroom Caulk
The following methods can help with suitable surfaces. Always identify the sealant and surrounding materials before choosing a cleaning method.
Method 1: Clean Bathroom Caulk with Mild Soap and Water
Mild soap and water are a useful starting point when the sealant has surface dirt, soap residue, or light grime.
What you need:
- Mild dish soap.
- Warm water.
- Soft cloth.
- Soft-bristled brush.
Steps:
- Remove loose dirt and visible surface residue.
- Mix a small amount of mild dish soap with warm water.
- Dampen a soft cloth with the cleaning solution.
- Gently wipe the affected caulk.
- Use a soft brush to clean narrow areas without applying excessive pressure.
- Wipe away loosened residue.
- Rinse or wipe with clean water as appropriate.
- Dry the surface with a clean microfiber cloth.
This method is suitable for routine cleaning but may not remove established mold growth or permanent discoloration.
Method 2: Use a Suitable Commercial Bathroom Mold Cleaner
A commercial mold cleaner may be useful when ordinary cleaning does not remove visible growth.
Choose a product that specifically states it is compatible with your sealant and surrounding surfaces.
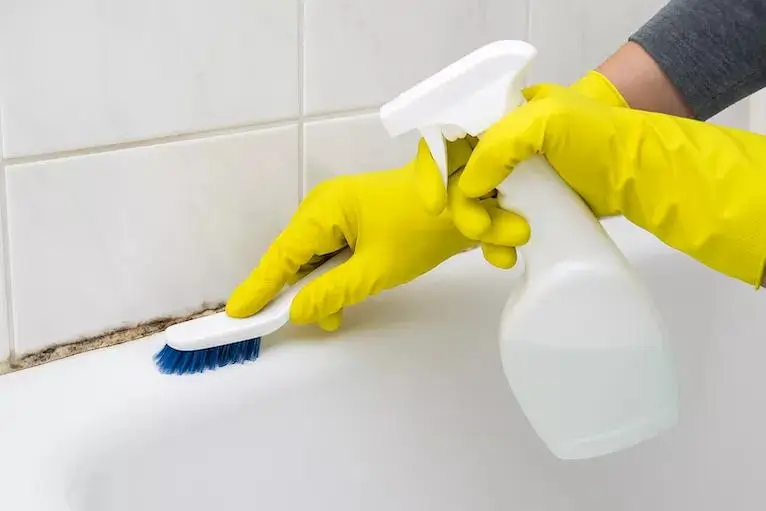
Steps:
- Read the complete product label.
- Confirm compatibility with silicone or acrylic caulk.
- Check whether the cleaner is safe for your tile and fixture materials.
- Open windows or operate suitable bathroom ventilation.
- Wear the protective equipment recommended on the label.
- Test the cleaner on a small, inconspicuous area if appropriate.
- Apply it according to the manufacturer’s instructions.
- Allow the recommended contact time.
- Rinse or wipe the surface as directed.
- Dry the area thoroughly.
For additional information about removing mold from household surfaces and correcting moisture problems, read the EPA’s basic mold cleanup guidance.
Never leave a product on the sealant longer than instructed in an attempt to improve its cleaning performance.
Method 3: Clean Mold from Silicone Caulk Carefully
Silicone sealant requires particular attention because some cleaning products may affect its appearance or performance.
Steps:
- Check the sealant manufacturer’s cleaning recommendations.
- Remove loose surface dirt using a damp cloth.
- Select a compatible cleaning product.
- Test a small, hidden section when appropriate.
- Apply the cleaner according to the label.
- Use a soft cloth or brush if permitted.
- Avoid excessive pressure and aggressive scrubbing.
- Remove the cleaner residue as instructed.
- Allow the area to dry.
- Inspect the silicone for remaining dark discoloration or damage.
If black stains remain after appropriate cleaning, the discoloration may be embedded or contamination may exist beneath the sealant.
Repeatedly applying stronger chemicals is not a reliable solution. Consider replacing the affected caulk.
Method 4: Use a Soft-Bristled Cleaning Brush
A soft-bristled brush can help remove dirt and residue from narrow sealant joints.
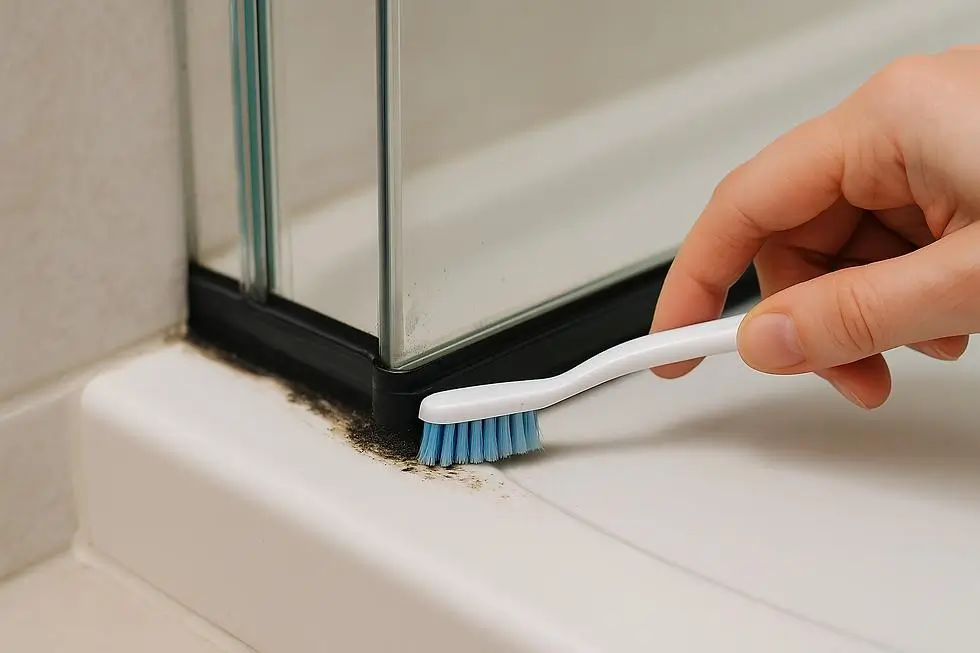
Choose a brush with flexible bristles that will not scratch surrounding surfaces.
Steps:
- Apply a compatible cleaning solution.
- Allow it to work for the period specified on its label.
- Gently brush along the caulk line.
- Pay attention to corners and narrow joints.
- Avoid pressing hard against the sealant.
- Remove loosened residue.
- Wipe the area clean and dry it.
Avoid metal brushes, sharp tools, and stiff abrasive scrubbers.
Method 5: When a Specialized Mold Cleaner Is Necessary
A specialized mold cleaner may be appropriate when visible growth remains after ordinary surface cleaning.
However, the correct product depends on the caulk, tile, and fixture materials.
A specialized cleaner cannot necessarily restore silicone that has become permanently discolored or contaminated underneath.
If cleaning does not improve the condition, inspect the joint for damage and consider replacement.
How to Remove Black Mold from Shower Caulk
Shower caulk is frequently exposed to running water, soap, shampoo, and humidity. These conditions make shower corners and edges common locations for mold growth.
While maintaining your shower, it is also worth keeping the drain clear. Read our guide on how to fix a clogged shower drain to deal with common drainage problems.
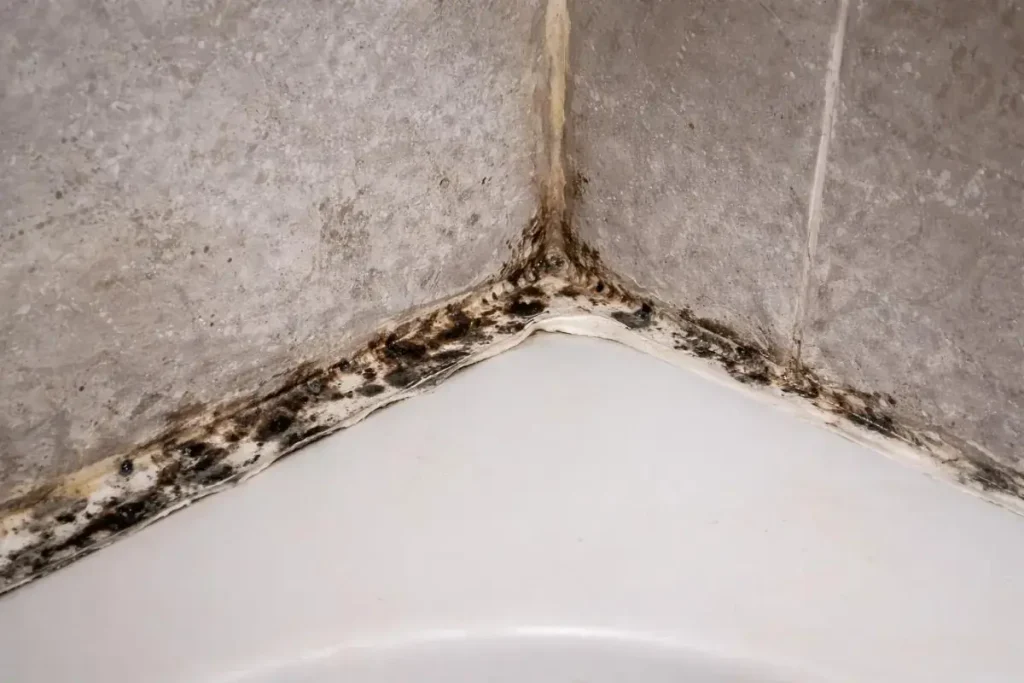
How to clean shower caulk:
- Remove loose soap residue and dirt.
- Identify the type of sealant.
- Check the surrounding tile material.
- Select a compatible cleaning product.
- Wear the recommended protective equipment.
- Apply the cleaner according to its instructions.
- Gently clean the affected area.
- Rinse or wipe away residue as directed.
- Dry the shower corner thoroughly.
- Check whether the black marks have disappeared.
If the dark staining remains, do not assume that stronger scrubbing will solve the problem. The sealant may need replacement.
How to Remove Mold from Bathtub Caulk
Bathtub edges can remain damp after bathing, especially where water collects between the tub and wall.
Mold may develop when soap residue, moisture, and dirt accumulate along the sealant.
Cleaning procedure:
- Remove bath products and loose debris.
- Wipe away surface dirt.
- Check whether the caulk is cracked or separating.
- Choose a cleaner compatible with the sealant and bathtub.
- Follow the product’s application instructions.
- Gently clean the affected area.
- Rinse or wipe as directed.
- Dry the bathtub edge.
- Inspect the joint for gaps and recurring moisture.
If water enters behind the sealant, surface cleaning will not address the underlying issue. Repair the moisture problem and replace damaged caulk where necessary.
How to Clean Moldy Caulk Without Damaging Tiles
Cleaning products that work on one bathroom surface may damage another.
Before cleaning, identify the surrounding material.
Protect Ceramic and Porcelain Tiles
Use a compatible cleaner and a non-abrasive sponge or soft brush.
Avoid harsh scrubbing that may damage grout or the finish of decorative surfaces.
Be Careful with Natural Stone
Marble, limestone, and travertine may be sensitive to acidic and other unsuitable cleaning products.
Use only a cleaner specifically approved for the type of natural stone.
Protect Acrylic Bathtubs and Fixtures
Some strong or abrasive cleaners may damage acrylic surfaces.
Check the bathtub or fixture manufacturer’s recommendations before using a mold remover.
Follow These Cleaning Precautions
- Test compatible cleaners in an inconspicuous area.
- Use soft cleaning tools.
- Avoid metal brushes.
- Do not scrape the sealant with sharp objects.
- Follow the product’s recommended contact time.
- Rinse or wipe as directed.
- Dry the surface after cleaning.
When Should You Remove and Replace Moldy Bathroom Caulk?
Sometimes cleaning is not enough.
If mold has affected the sealant beneath its surface or the material has deteriorated, removing and replacing it may be the better option.
Signs That Bathroom Caulk Needs Replacement
Look for these warning signs:
- Persistent black discoloration after appropriate cleaning.
- Dark marks that appear to originate beneath the sealant.
- Cracked or split caulk.
- Peeling or separated edges.
- Missing sections of sealant.
- Gaps between the bathtub and wall.
- Water entering behind the joint.
- Repeated mold growth in the same location.
- Sealant that no longer bonds properly to surrounding surfaces.
Basic Steps for Removing Old Bathroom Caulk
Replacing bathroom caulk requires careful preparation.

- Choose a suitable caulk-removal tool.
- Carefully cut and remove the old sealant.
- Avoid scratching tiles or damaging the bathtub.
- Remove remaining sealant residue using a compatible product.
- Inspect the joint for moisture damage.
- Address leaks and any mold contamination.
- Clean the joint appropriately.
- Allow the joint to dry completely.
- Apply a suitable bathroom sealant according to the manufacturer’s instructions.
- Allow the sealant to cure for the recommended time before exposing it to water.
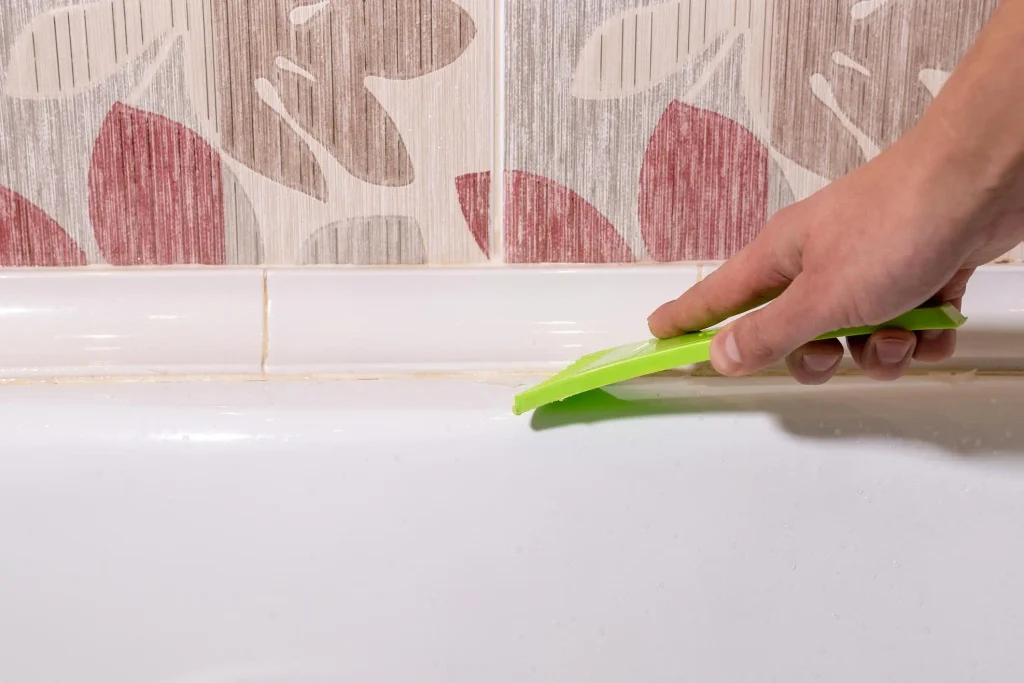
Never apply fresh caulk over wet or mold-contaminated old sealant.
Common Mistakes to Avoid When Cleaning Moldy Bathroom Caulk
Avoid these mistakes when dealing with mold on bathroom sealant.
1. Assuming every black mark is mold: Dirt, mineral deposits, and permanent staining can look similar.
2. Using unsuitable cleaning products: Some products can damage sealant, grout, natural stone, or fixtures.
3. Mixing cleaning chemicals: Combining products can create dangerous reactions and toxic gases.
4. Scrubbing too aggressively: Excessive pressure can damage the caulk.
5. Using metal brushes: Metal tools may scratch surfaces and damage sealant.
6. Ignoring product instructions: Incorrect contact times and applications can damage materials.
7. Applying new caulk over old moldy sealant: This hides the problem instead of resolving it.
8. Ignoring leaks: Persistent moisture can cause mold to return.
9. Forgetting ventilation: Humid air encourages recurring moisture problems.
10. Assuming mold-resistant caulk is completely mold-proof: Moisture control and maintenance are still necessary.
Important Chemical Safety Warning
Never mix household bleach with vinegar, ammonia, acids, toilet cleaners, or other cleaning products.
Mixing cleaning chemicals can release dangerous gases or cause other harmful reactions.
For more information about the dangers of combining household cleaning products, read Poison Control’s guidance on chlorine gas exposure.
Use only one cleaning product at a time, follow its label, and provide suitable ventilation.
Before starting a mold cleanup project, review the CDC mold cleanup recommendations to understand protective equipment and precautions for reducing exposure during cleaning.
How to Prevent Mold from Returning on Bathroom Caulk
Removing existing mold is only part of the solution. You also need to reduce the moisture conditions that allow it to return.
1. Wipe Wet Bathroom Surfaces
After showering, wipe excess water from shower walls, bathtub edges, and sealant joints.
Keeping bathroom floors and surfaces clean and dry is also important for preventing accidents. Explore our bathroom safety tips to learn more about reducing slips and falls in your bathroom.
2. Improve Bathroom Ventilation
Use an exhaust fan that vents outdoors where available.
Keep it running during bathing and afterward according to the fan and building guidance.
For more practical advice on controlling household moisture and preventing recurring mold problems, see the EPA’s guide to mold, moisture, and your home.
3. Remove Soap and Shampoo Residue
Clean shower surfaces regularly to prevent residue from collecting around sealant joints.
4. Allow the Bathroom to Dry
Open a window or door where practical and safe to improve air circulation.
5. Repair Plumbing Leaks
Check faucets, pipes, shower fittings, and bathtub connections for leaks.
Fixing the source of unwanted moisture is essential.
6. Inspect Caulk Regularly
Look for cracks, peeling edges, gaps, and recurring discoloration.
Address small maintenance issues before they become larger problems.
7. Use Suitable Mold-Resistant Sealant
When replacing damaged caulk, choose a bathroom sealant designed for the intended wet-area application.
Remember that mold-resistant additives cannot eliminate the need for cleaning and moisture control.
How Often Should You Clean and Inspect Bathroom Caulk?
There is no single cleaning schedule suitable for every bathroom. The ideal frequency depends on humidity, shower usage, ventilation, and the condition of the sealant.
Here is a practical suggested maintenance routine:
| Frequency | Recommended task |
|---|---|
| After showering | Remove excess water where practical |
| Weekly | Clean soap residue and surface dirt |
| Monthly | Inspect caulk joints for dark spots and deterioration |
| Every 3–6 months | Check bathroom corners, tub edges, and ventilation performance |
| When damage appears | Investigate and repair the problem promptly |
These are suggested household maintenance intervals, not universal manufacturer requirements.
When Should You Consider Professional Mold Removal?
DIY cleaning may not be appropriate for every mold problem.
Consider professional assessment when:
- Mold covers a large or expanding area.
- Growth repeatedly returns despite appropriate cleaning.
- There is suspected mold behind tiles or inside walls.
- Persistent plumbing leaks are present.
- Building materials have become water-damaged.
- You notice signs of structural moisture damage.
- The affected area cannot be safely cleaned.
- Occupants have health concerns that make exposure during cleaning inappropriate.
For additional information about potential mold-related health effects and people who may need extra precautions, visit the CDC’s mold health information guide.
The US Environmental Protection Agency provides additional guidance for household mold cleanup and moisture control.
If you suspect a hidden leak or extensive contamination, address the source rather than repeatedly cleaning the visible surface.
Frequently Asked Questions About Removing Mold from Bathroom Caulk
1. How do you remove mold from bathroom caulk?
Start by identifying the sealant and surrounding surfaces. Remove loose dirt, choose a compatible cleaning product, follow its instructions, gently clean the affected area, and dry it thoroughly. Replace the caulk if staining is embedded or the sealant is damaged.
2. How do you remove black mold from silicone caulk?
Use a cleaner approved for the particular silicone sealant and surrounding surface. Follow its instructions and avoid aggressive scrubbing. If black staining remains embedded in the silicone, replacement may be necessary.
3. Why does bathroom caulk turn black?
Black discoloration can result from mold growth, dirt, soap residue, or permanent staining. Persistent moisture and poor ventilation can encourage mold to develop around bathroom sealant.
4. Can mold grow inside silicone caulk?
Mold can grow on silicone surfaces and may affect the material beneath or around deteriorating sealant. If contamination is beneath the silicone, surface cleaning may not remove it completely.
5. Can you remove mold from shower sealant without replacing it?
Sometimes. Surface growth may respond to suitable cleaning methods. However, embedded staining, damaged sealant, or contamination beneath the joint may require removal and replacement.
6. Does vinegar remove mold from bathroom caulk?
Vinegar is not a universally suitable mold treatment for bathroom caulk. Its compatibility depends on the sealant and surrounding materials. Follow manufacturer recommendations rather than assuming vinegar is safe or effective for every surface.
Never mix vinegar with bleach or other cleaning products.
7. Can bleach damage silicone caulk?
The effect depends on the product formulation, concentration, contact time, and sealant manufacturer’s recommendations. Some products may affect sealant or nearby materials. Do not use bleach unless the product and surface manufacturers permit it.
8. What is the best cleaner for moldy bathroom caulk?
The best choice is a product specifically approved for the type of caulk and surrounding surface. Check its label, follow the application instructions, and test an inconspicuous area when appropriate.
9. How do you remove mold from bathtub caulk?
Clean away loose dirt and residue, apply a compatible mold cleaner according to its instructions, gently clean the affected joint, and dry it. Replace damaged or persistently stained sealant where necessary.
10. Why does mold keep coming back on bathroom sealant?
Recurring mold may indicate persistent humidity, inadequate ventilation, soap residue, a plumbing leak, or deteriorating caulk. Addressing the moisture source is essential.
11. When should moldy bathroom caulk be replaced?
Replace it when the sealant is cracked, peeling, separated, poorly bonded, or persistently discolored after appropriate cleaning. Also investigate contamination beneath the sealant.
12. Can you apply new caulk over old moldy caulk?
No. Remove the affected sealant, clean the joint, address any moisture problems, and allow the area to dry before applying new caulk.
13. Does mold-resistant caulk prevent mold completely?
No. Mold-resistant sealant contains additives designed to help resist mold growth, but it cannot guarantee complete prevention in persistently damp conditions.
14. How do you prevent black mold from returning?
Improve bathroom ventilation, wipe excess water, clean soap residue, repair leaks, allow surfaces to dry, and inspect the sealant regularly.
15. Is black mold on bathroom caulk dangerous?
You cannot determine the exact mold species or health risk from colour alone. Mold exposure can affect people differently, particularly those with allergies, respiratory conditions, or weakened immune systems. Avoid unnecessary exposure and seek professional advice when the problem is extensive or health concerns are present.
Conclusion
Knowing how to remove mold from bathroom caulk can help you maintain a cleaner and healthier bathroom environment.
Start by identifying the type of sealant and choosing a compatible cleaning product. Use gentle cleaning techniques, follow product instructions, and avoid dangerous chemical combinations.
Remember that cleaning is not always enough. If black stains remain embedded in silicone, the sealant is cracked, or moisture is entering behind the joint, removing and replacing the old caulk may be the better solution.
Most importantly, prevent mold from returning by improving bathroom ventilation, removing excess moisture, cleaning soap residue, and repairing leaks promptly.
With regular maintenance and proper moisture control, you can keep shower and bathtub sealant in better condition for longer.
For more practical bathroom cleaning and home maintenance advice, explore other helpful guides on Fix The Annoying.