
Introduction
How to fix a loose tile on the floor depends on why the tile has become loose in the first place. A tile may move because the adhesive has failed, the surface underneath was not properly prepared, or moisture has affected the area.
A loose tile should not simply be ignored. Continued movement can damage the grout around it and may eventually cause the tile to crack.
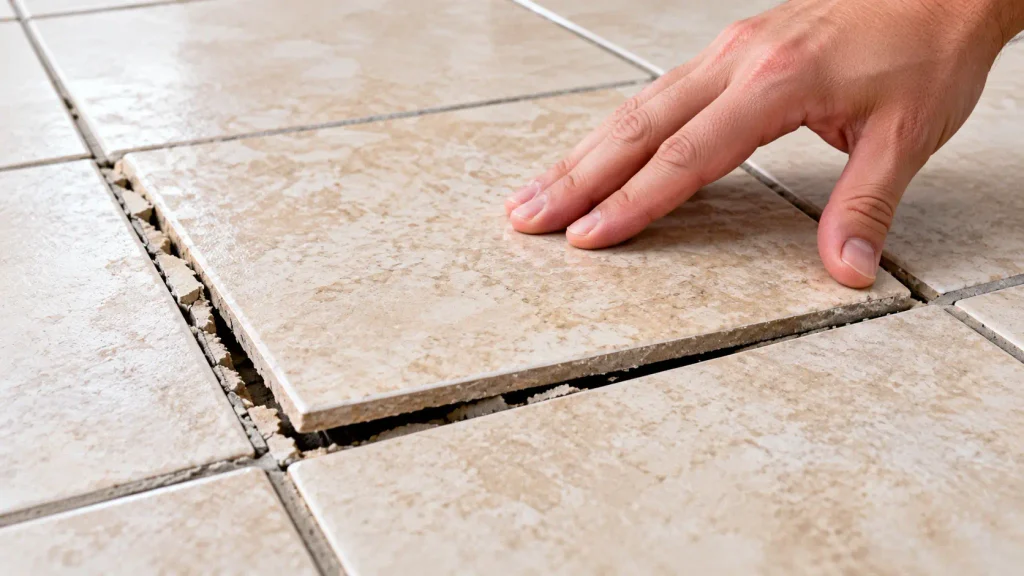
The good news is that if the tile itself is still in good condition, you can often remove it, clean the surface, apply fresh tile adhesive or mortar, and reset the tile without replacing the entire floor.
In this guide, we’ll show you how to fix a loose tile on the floor safely, from removing the surrounding grout to resetting and regrouting the tile.
Why Does a Floor Tile Become Loose?
Before repairing a loose tile, try to understand what caused the problem.
Common causes include:
- Failed or insufficient tile adhesive
- Poor surface preparation
- Movement in the subfloor
- Moisture getting underneath the tile
- Heavy impact or repeated pressure
- Incorrect installation
- Deteriorating grout around the tile
- Changes in the underlying surface
If several nearby tiles are loose, cracked, or moving, the problem may be larger than one tile.
How to Tell If a Floor Tile Is Loose
A loose tile may show one or more of these signs:
- The tile moves slightly when you step on it.
- You hear a hollow sound when tapping it gently.
- Grout around the tile is cracked or breaking away.
- The tile sits slightly higher or lower than nearby tiles.
- The tile makes a clicking or popping sound under pressure.
Don’t press excessively on the tile just to test it. Too much movement or force can crack an otherwise reusable tile.
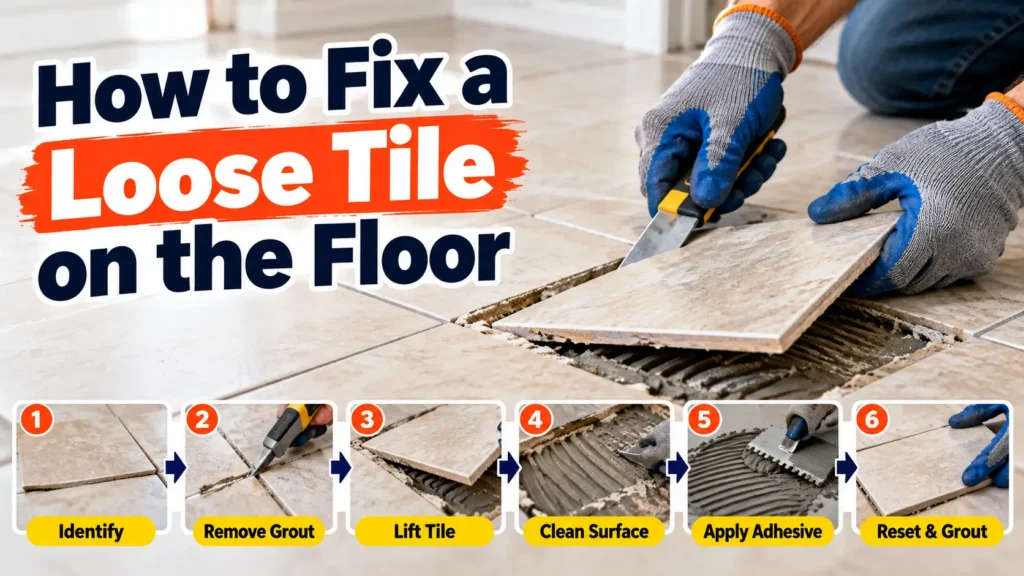
How to Fix a Loose Tile on the Floor: 7 Easy Steps
1. Gather the Tools and Materials
Before starting, gather the tools and materials you may need:
- Grout removal tool
- Utility knife
- Putty knife or suitable scraper
- Small pry tool
- Tile adhesive or appropriate thin-set mortar
- Notched trowel
- Rubber mallet
- Tile spacers
- Level or straightedge
- Replacement grout
- Grout float
- Sponge
- Safety glasses
- Work gloves
Choose an adhesive or mortar that is suitable for your specific tile type and floor surface, and follow the manufacturer’s instructions.
2. Remove the Grout Around the Loose Tile
Start by removing the grout around all sides of the loose tile.
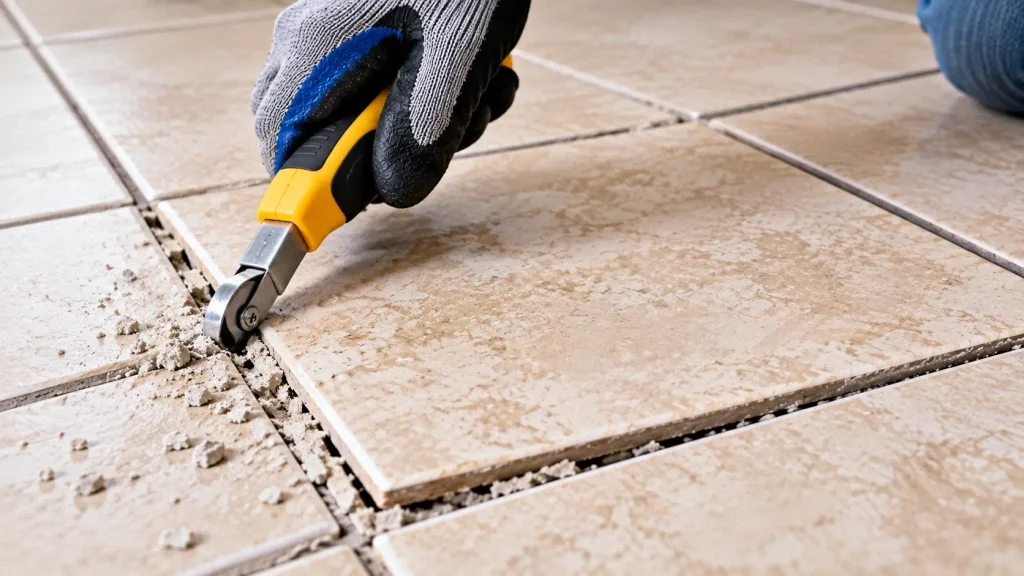
Use a grout removal tool or another suitable tool and work carefully along the joints.
Try to remove enough grout to separate the tile from the surrounding tiles.
Tip:
Take your time during this step. Damaging the edges of neighboring tiles can create another repair that you didn’t originally need.
If the grout is already cracked or missing, removal may be easier.
3. Carefully Lift the Loose Tile
Once the surrounding grout has been removed, carefully try to lift the tile.
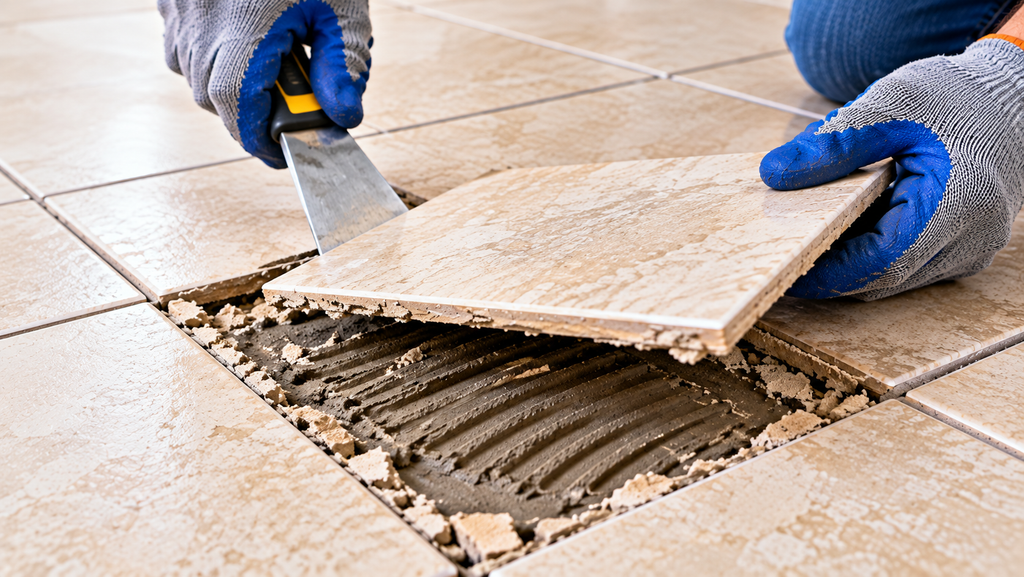
If the tile moves easily, use a suitable putty knife or pry tool to gently loosen it.
Work gradually around the edges instead of forcing the tool underneath one point.
Do not force the tile upward if it feels firmly attached. Excessive force can crack the tile or damage the floor underneath.
If the tile breaks during removal and you cannot safely remove it without damaging surrounding tiles, you may need to replace it with a matching tile.
4. Clean the Tile and Floor Surface
After removing the tile, clean away the old adhesive from both the back of the tile and the exposed floor surface.
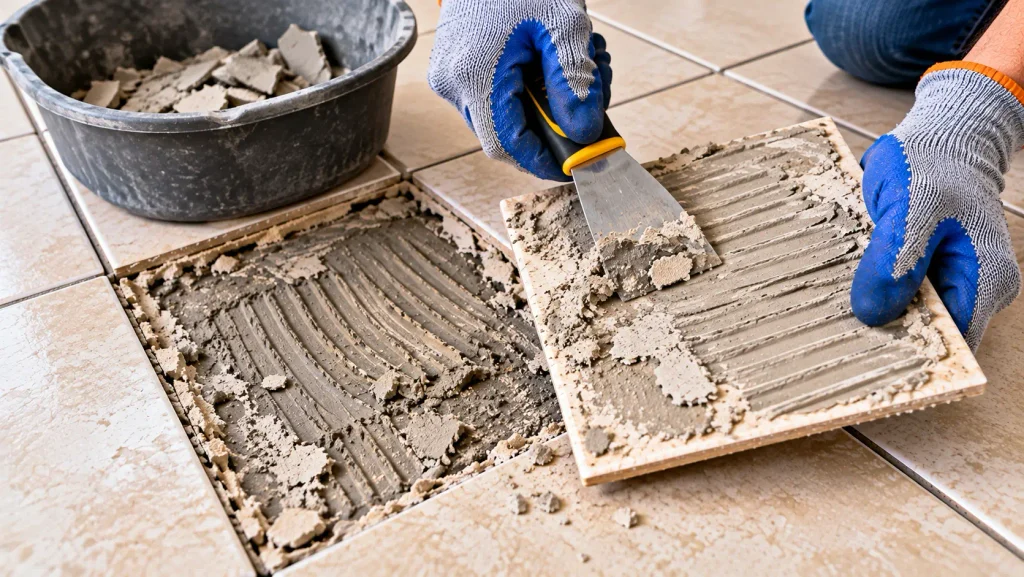
Use a suitable scraper to remove loose adhesive.
The surface should be:
- Clean
- Stable
- Dry
- Free of loose debris
- Suitable for the new adhesive or mortar
Don’t leave thick pieces of old adhesive underneath the tile because they can prevent the tile from sitting level with the surrounding floor.
Important:
If you discover water damage, a soft or damaged subfloor, or another underlying problem, stop and address the cause before resetting the tile.
5. Apply New Tile Adhesive or Mortar
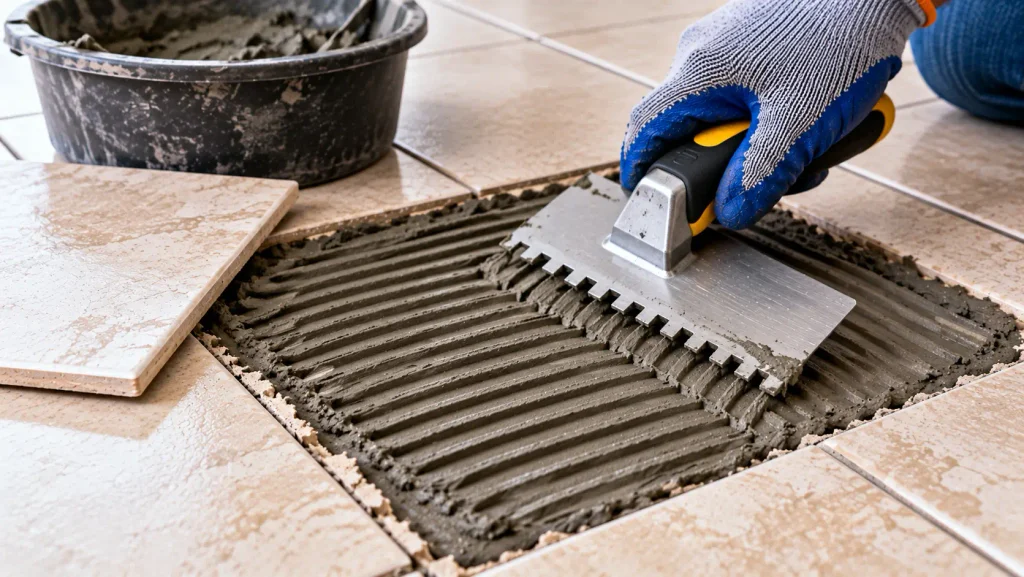
Apply the appropriate tile adhesive or mortar according to the manufacturer’s instructions.
For additional floor tile installation guidance, see Daltile’s Floor Tile Installation Instructions, which covers surface preparation, adhesive application, tile setting, and grouting.
Use a notched trowel to create an even layer.
Avoid applying an excessive amount of adhesive. Too much material can cause the tile to sit higher than the surrounding tiles.
For the best result, use the same type of installation material recommended for your tile and floor surface.
6. Reset the Tile and Check the Level
Carefully place the tile back into its original position.
Use the surrounding tiles as your reference for alignment and height.
If necessary, use tile spacers to maintain the correct grout joints.
Gently press the tile into place. You can use a rubber mallet carefully to help seat the tile, but avoid hitting the tile hard.
Place a level or straightedge across the repaired area to check that the tile is sitting properly.
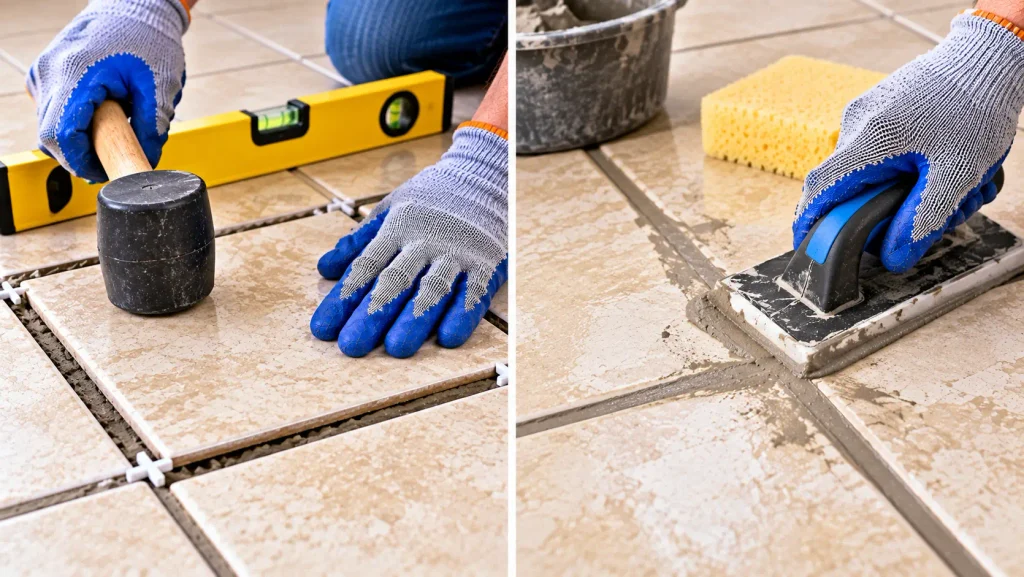
Before moving on, check:
- The tile is aligned with nearby tiles.
- The surface is level.
- The grout gaps are even.
- The tile does not rock when gently pressed.
Allow the adhesive or mortar to cure for the time specified by the manufacturer.
7. Regrout Around the Tile
Once the adhesive has cured properly, fill the joints around the tile with suitable grout.
Use a grout float to work the grout into the joints.
Remove excess grout from the tile surface with a damp sponge before it becomes difficult to clean.
Allow the grout to cure according to the product instructions.
Avoid heavy foot traffic on the repaired area until the adhesive and grout have had enough time to cure.
What If the Loose Tile Is Cracked?
If the tile is cracked, badly chipped, or damaged during removal, replacing it is usually more practical than trying to reuse it.
Before removing a damaged tile, protect the surrounding tiles and Wear safety glasses and work gloves when removing a cracked tile, and protect nearby surfaces from sharp fragments.
Work from the center toward the edges and avoid hitting the neighboring tiles.
If you don’t have a matching replacement tile, check whether you have spare tiles from the original installation.
What If Several Floor Tiles Are Loose?
If several tiles are loose in the same area, don’t assume that each tile simply needs new adhesive.
Multiple loose tiles can indicate an underlying problem such as:
- Subfloor movement
- Moisture
- Poor bonding
- Improper installation
- Expansion or movement problems
In this situation, repairing one tile may only provide a temporary solution.
Inspect the surrounding area carefully and consider professional help if the underlying floor structure appears damaged.
Common Mistakes to Avoid
When fixing a loose floor tile, avoid these common mistakes:
- Regrouting without fixing the loose tile
- Applying new adhesive over a dirty surface
- Leaving large pieces of old adhesive underneath
- Using an adhesive that is not suitable for the tile or floor
- Applying too much adhesive
- Ignoring moisture underneath the tile
- Forcing a tile that is stuck
- Walking on the tile before the adhesive has cured
- Grouting before the adhesive has properly set
- Ignoring several loose tiles in the same area
The goal is not just to make the tile feel firm again. You also want to address the reason it became loose.
When Should You Call a Professional?
A single loose tile is often a manageable repair, but some situations need professional attention.
Consider getting professional help if:
- Several tiles are loose.
- The floor underneath feels soft or unstable.
- You find significant water damage.
- The subfloor appears damaged.
- Tiles continue becoming loose after repair.
- The cause of the movement is unclear.
- The repair involves structural problems.
- You are working with an old flooring installation and suspect hazardous materials.
If an older floor or adhesive may contain asbestos, do not sand, grind, or disturb the material unnecessarily. Get appropriate professional advice before continuing.
If you’re also dealing with other household repair problems, you can learn how to fix common issues such as a leaky faucet with our step-by-step guide.
How to Prevent Floor Tiles From Becoming Loose
Once you’ve repaired the tile, a few habits can help reduce future problems.
Keep moisture under control
Fix leaks and don’t allow water to remain around areas where it can reach the flooring.
Replace damaged grout
Cracked or missing grout can allow moisture to reach areas underneath the tile.
Avoid harsh impacts
Heavy objects dropped on tile can crack the tile or damage the bond underneath.
Check unusual movement early
If a tile starts moving or making a clicking sound, investigate it before the surrounding grout and tile edges become damaged.
If you are dealing with other common household problems, explore our Home Fixes guides for practical repair and maintenance solutions.
Regularly checking floors, walls, doors, plumbing, and other areas can help you spot small problems before they become bigger repairs. Our Monthly Home Maintenance Checklist can help you keep track of routine home checks.
Frequently Asked Questions
Can I fix a loose floor tile without removing it?
Sometimes a minor problem may appear to improve after repairing the grout, but if the tile itself is moving because the bond underneath has failed, simply adding new grout usually won’t fix the underlying problem.
For a properly bonded repair, the tile generally needs to be removed, the surface prepared, and the tile reset with suitable adhesive or mortar.
Why does my floor tile sound hollow?
A hollow sound can occur when there is a gap or incomplete contact beneath the tile. However, a hollow sound by itself does not always mean that a tile is loose.
Check whether the tile actually moves or shows other signs of bonding failure.
Can I reuse a loose tile?
Yes, if the tile is undamaged and can be removed without cracking it. Clean the old adhesive carefully and make sure the tile is suitable for resetting.
How long should I wait before walking on a repaired tile?
Follow the curing time specified by the adhesive or mortar manufacturer. Avoid heavy traffic until the material has cured sufficiently.
Do I need to replace the whole floor if one tile is loose?
Not necessarily. If the surrounding floor is stable and the problem is limited to one tile, you may be able to remove and reset that tile.
However, several loose tiles may indicate a larger installation or subfloor problem.
Why does my tile keep becoming loose after repair?
If the tile becomes loose again, the underlying cause may not have been fixed. Moisture, subfloor movement, poor bonding, or an unsuitable installation material can cause repeated problems.
Final Takeaway
How to fix a loose tile on the floor starts with finding out why the tile is moving. For a single undamaged tile, carefully remove the surrounding grout, lift the tile, clean the old adhesive, prepare the surface, apply suitable adhesive or mortar, and reset the tile at the correct level.
Don’t simply cover a loose tile with new grout. If there is moisture, damaged flooring, or several loose tiles, investigate the underlying problem before making the repair.
A careful repair can restore a loose tile without replacing the entire floor, provided the surrounding surface is stable and the correct materials are used.