
A dirty shower head can make your daily shower less enjoyable. Over time, mineral deposits, limescale, soap residue, and dirt can collect around the spray nozzles and inside the shower head. These deposits may block small water openings, cause uneven spraying, and affect water flow.
If you live in an area with hard water, you may notice white or chalky deposits around the shower nozzles. These are commonly associated with minerals such as calcium and magnesium left behind as water evaporates.
Learning how to clean a shower head can help remove visible buildup, maintain proper water flow, and keep your bathroom fixtures looking clean. The right cleaning method depends on the shower head’s material, finish, design, and manufacturer’s care instructions.
In this guide, you will learn how to clean a shower head with suitable household cleaning methods, remove limescale, unclog spray holes, clean fixed and removable shower heads, and prevent future mineral buildup without damaging delicate finishes.
Why Does a Shower Head Get Dirty or Clogged?
Shower heads are regularly exposed to water, soap, shampoo, and moisture. These conditions can cause different types of residue to accumulate over time.
Here are the most common reasons a shower head becomes dirty or clogged.
1. Hard Water Mineral Deposits
Hard water contains dissolved minerals, particularly calcium and magnesium. When water evaporates from the shower head, these minerals can remain behind and gradually form deposits.
The CDC guidance on cleaning shower heads recommends cleaning shower heads and faucet aerators when visible buildup appears and following the manufacturer’s cleaning instructions.
2. Limescale Buildup
Limescale is a hard, chalky deposit commonly associated with hard water. It can collect around spray openings and on the exterior of shower heads.
If you also notice water collecting on your shower floor, read our guide on how to fix a clogged shower drain to learn how to remove common drain blockages and improve drainage.
3. Soap and Shampoo Residue
Soap, shampoo, and body wash can leave residue around shower nozzles. This residue may combine with minerals and dirt, making the shower head harder to clean.
4. Dirt and Dust
Bathroom dust, airborne particles, and general dirt can accumulate on the shower head, especially around its spray openings.
5. Blocked Rubber Spray Nozzles
Many modern shower heads have flexible rubber or silicone nozzles. Mineral deposits can collect around these openings and interfere with the spray pattern.
6. Internal Mineral Buildup
Mineral deposits can also develop inside removable shower head components, screens, and water passages. External cleaning may not remove this buildup.
Regular inspection and appropriate cleaning can help prevent deposits from becoming difficult to remove.
Signs Your Shower Head Needs Cleaning
A shower head may need cleaning when you notice one or more of these signs:
- Uneven water spray: Water comes out in different directions instead of a consistent pattern.
- Blocked spray holes: Some nozzles produce little or no water.
- Reduced water flow: The shower seems weaker than usual.
- White crusty deposits: Chalky marks appear around the spray openings.
- Dirty nozzles: The spray surface looks discoloured or has visible residue.
- Sideways spraying: Blocked openings cause water to spray at unusual angles.
- Visible buildup: Mineral deposits are present around the shower head.
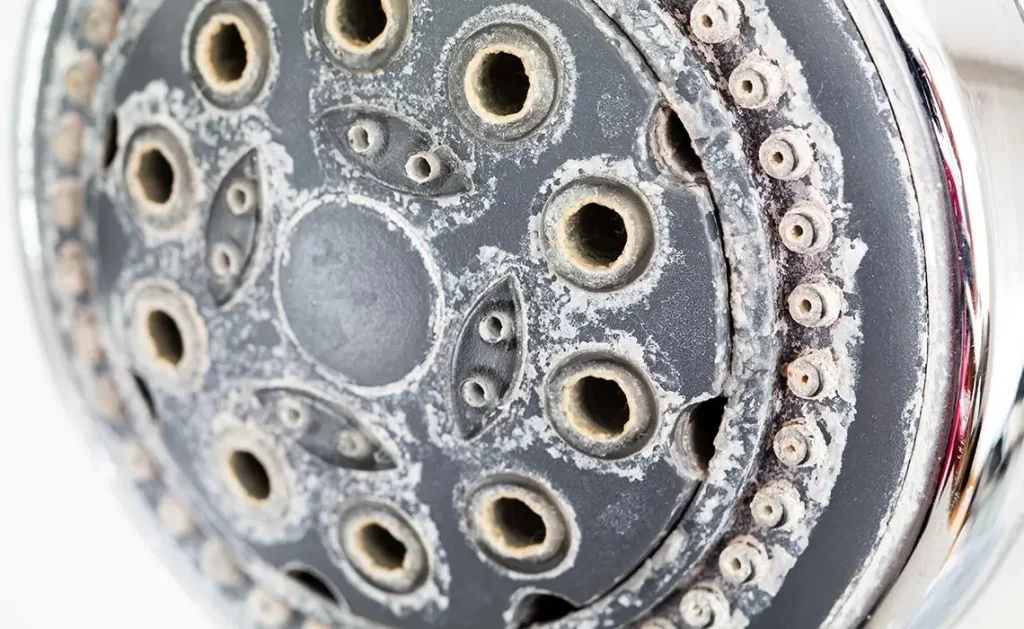
Cleaning may resolve problems caused by deposits. However, low water pressure can also result from plumbing restrictions, a faulty valve, a water supply issue, or a pressure problem elsewhere in the property.
If several taps or showers have weak water flow, investigate the wider plumbing system rather than assuming the shower head is responsible.
What You Need to Clean a Shower Head
Before starting, collect the necessary supplies.
| Cleaning supply | Purpose |
|---|---|
| White vinegar | Helps dissolve certain mineral deposits when compatible |
| Warm water | Helps loosen ordinary dirt and residue |
| Microfiber cloth | Wipes the exterior without unnecessary scratching |
| Soft toothbrush | Gently cleans around spray openings |
| Small soft brush | Reaches difficult areas |
| Rubber gloves | Protects hands during cleaning |
| Plastic bowl | Holds a removable shower head during cleaning |
| Plastic bag | Can hold a compatible cleaning solution around a fixed shower head |
| Soft sponge | Cleans the exterior |
| Approved bathroom cleaner | Provides an alternative when vinegar is unsuitable |
Important: Check the shower head manufacturer’s cleaning instructions before using vinegar, descaling products, or other chemicals. Decorative finishes and protective coatings may be damaged by acidic cleaners.
How to Clean a Shower Head with Vinegar
White vinegar is commonly used to loosen mineral deposits because it contains acetic acid. However, it is not suitable for every shower head.
Only use vinegar when the manufacturer confirms that it is compatible with the shower head’s material and finish.
Step 1. Check the Shower Head Material
Identify whether your shower head is made from chrome-plated metal, stainless steel, brass, plastic, or another material.
Also check whether the surface has a special coating or decorative finish.
Do not assume that two shower heads with similar appearances can tolerate the same cleaning products.
Step 2. Read the Manufacturer’s Cleaning Instructions
Check the product manual or manufacturer’s website.
Some manufacturers recommend mild soap and water rather than vinegar or acidic descaling solutions.
Follow the manufacturer’s instructions whenever they differ from general household cleaning advice.
Step 3. Prepare a Suitable Cleaning Solution
If vinegar is approved, prepare a suitable solution according to the manufacturer’s directions.
Use a clean container and avoid mixing vinegar with other cleaning products.
If vinegar is not permitted, choose a manufacturer-approved cleaner instead.
Step 4. Apply the Cleaning Solution
For a removable shower head, place it in a suitable plastic container and apply the approved cleaning solution.
Make sure the spray openings are exposed to the solution without unnecessarily soaking sensitive components.

Step 5. Allow Appropriate Contact Time
Follow the recommended contact time on the product label or manufacturer’s instructions.
Avoid leaving acidic solutions on the shower head for extended periods. Prolonged exposure can damage some finishes, coatings, and components.
Step 6. Clean the Spray Nozzles
After the deposits have loosened, gently clean the spray openings with a soft toothbrush or suitable cleaning brush.
For flexible rubber nozzles, gently rub the openings with your fingers if the manufacturer permits it.
Never use sharp metal objects to force mineral deposits out of the holes.
Step 7. Rinse Thoroughly
Rinse the shower head with clean water to remove the cleaning solution and loosened deposits.
Pay attention to the spray openings and any removable parts.
Step 8. Dry and Inspect the Shower Head
Wipe the exterior using a clean microfiber cloth.
Inspect the nozzles for remaining deposits, damaged openings, or other visible problems.
Reinstall the shower head if it was removed, then check its spray pattern and connections.
How to Clean a Shower Head Without Removing It
If your shower head is fixed to the wall or difficult to remove, you may be able to clean it without taking it apart.
Step 1. Check the Shower Head Finish
Identify the material and finish before choosing a cleaning solution.
Make sure the cleaning method is approved for your particular shower head.
Step 2. Prepare a Suitable Cleaning Solution
Prepare a compatible cleaning solution according to the manufacturer’s instructions.
If vinegar is unsuitable, use a recommended alternative.
Step 3. Use a Plastic Bag Carefully
Choose a sturdy plastic bag large enough to fit around the shower head.
Add only enough approved cleaning solution to contact the affected areas.
Position the bag carefully around the shower head without pulling or bending the shower arm.
Step 4. Secure the Bag Safely
Secure the bag with a suitable fastening method.
Check that it is stable and will not slip or spill.
Avoid placing unnecessary weight on the shower head, hose, or wall connection.
Step 5. Remove the Bag and Rinse
Remove the bag carefully and dispose of the used solution appropriately.
Rinse the shower head thoroughly with clean water to remove all remaining residue.
Step 6. Clean the Nozzles and Dry
Gently rub flexible nozzles if permitted, or use a soft toothbrush to remove loosened deposits.
Wipe the exterior with a microfiber cloth.
Remember: Do not leave vinegar or another acidic cleaner on the shower head longer than the manufacturer allows.
How to Remove and Clean a Shower Head
Sometimes external cleaning is not enough. Removing a shower head may help you access mineral buildup around its connection, inlet screen, or other removable components.
Before beginning, check the manufacturer’s removal instructions. If you are renting, confirm that you are allowed to remove the fixture.
Step 1. Turn Off the Shower
Turn off the shower and make sure the water is not running.
Allow hot components to cool before handling them.
Step 2. Protect the Shower Finish
Wrap a soft cloth around the connection to help protect the finish.
This reduces the risk of scratches when using a tool.
Step 3. Loosen the Connection Carefully
If the shower head is designed to be removable, carefully loosen its connection.
Use an appropriate adjustable wrench only when necessary, and protect the fitting with a cloth.
Avoid applying excessive force. If the connection is stuck, corroded, or difficult to access, contact a plumber.
Step 4. Inspect the Washer and Connection
Once removed, inspect the washer, threaded connection, and any accessible inlet screen.
Look for visible mineral deposits, damage, or deterioration.
Do not dismantle sealed internal components.
If you notice dripping or leakage around other bathroom fixtures, check our guide on how to fix a leaky faucet for practical plumbing troubleshooting tips.
Step 5. Clean the Removable Components
Clean accessible parts using warm water, a soft brush, and a manufacturer-approved cleaning solution.
Remove loose deposits gently.
Step 6. Reinstall the Shower Head
Reinstall the shower head according to the manufacturer’s instructions.
Check that the washer is correctly positioned and the connection is secure.
Avoid overtightening.
Step 7. Check for Leaks
Turn on the shower and inspect the connection.
If water leaks around the fitting, turn off the shower and check the washer and installation.
If the leak continues, seek professional plumbing assistance.
How to Clean Different Types of Shower Heads
Different materials and designs require different cleaning approaches.
Before choosing a cleaning product, check the manufacturer care and cleaning guidelines to understand which products and cleaning methods are suitable for your shower head’s material and finish.

How to Clean a Chrome Shower Head
Chrome-plated shower heads can be scratched or damaged by unsuitable cleaners.
- Use a soft microfiber cloth.
- Clean ordinary dirt with mild soap and water when permitted.
- Avoid abrasive pads and harsh scouring powders.
- Use acidic descalers only when the manufacturer approves them.
- Dry the surface to reduce water marks.
For additional guidance on protecting decorative surfaces, check these cleaning instructions for decorative metal finishes before using cleaners or abrasive materials.
How to Clean a Stainless Steel Shower Head
Stainless steel shower heads generally benefit from gentle cleaning.
- Use a soft cloth and suitable mild cleaner.
- Avoid steel wool and abrasive brushes.
- Rinse away cleaning residue.
- Dry the surface after cleaning.
- Follow the manufacturer’s recommendations for mineral removal.
How to Clean a Brass Shower Head
Brass shower heads need particular care because their finishes can vary.
Some are polished and lacquered, while others are plated or uncoated.
- Identify the type of brass finish first.
- Avoid vinegar unless specifically approved.
- Do not use abrasive cleaning tools.
- Use only recommended cleaning products.
- Dry the surface with a soft cloth.
How to Clean a Plastic Shower Head
Plastic shower heads may be vulnerable to harsh chemicals and scratching.
- Use warm water and mild soap when approved.
- Clean the spray openings with a soft brush.
- Avoid strong solvents and abrasive pads.
- Do not use excessive force on flexible components.
How to Clean a Rainfall Shower Head
Rainfall shower heads usually have a large spray surface with multiple openings.
- Inspect the entire spray surface.
- Look for visible mineral buildup.
- Clean accessible nozzles gently.
- Use only a compatible descaling solution.
- Rinse the complete spray surface thoroughly.
If the rainfall shower head has a complicated internal design, follow the manufacturer’s maintenance instructions rather than disassembling it.
How to Clean a Handheld Shower Head
Handheld shower heads may have detachable spray heads, hoses, and removable components.
- Check whether the shower head can be detached from its hose.
- Inspect the connection and accessible screen.
- Clean the exterior with a suitable cloth.
- Follow the instructions for removable parts.
- Inspect the hose for leaks, cracks, or deterioration.
Do not soak electronic, filtered, or specialty components unless the manufacturer explicitly permits it.
How to Remove Limescale and Mineral Deposits from a Shower Head
Limescale can gradually collect around spray openings and reduce the number of functioning nozzles.
To remove mineral deposits:
- Inspect the shower head for white or chalky buildup.
- Identify its material and finish.
- Choose a compatible descaling product.
- Apply it according to the manufacturer’s instructions.
- Gently clean the affected openings with a soft brush.
- Rinse the shower head thoroughly.
- Check whether the spray pattern has improved.
For additional guidance, follow the shower head mineral deposit cleaning instructions provided by the manufacturer, including recommendations for cleaning spray nozzles and removing mineral deposits.
Vinegar may help loosen some mineral deposits, but it is not suitable for every surface.
For stubborn buildup, consider a manufacturer-approved descaler. If deposits remain inside inaccessible components, replacement may be more practical.
How to Clean Shower Head Rubber Nozzles
Many shower heads have flexible rubber or silicone spray nozzles.
These nozzles can collect mineral deposits that interfere with water flow.
Try the following approach:
- Check the manufacturer’s cleaning instructions.
- Identify the flexible rubber or silicone openings.
- Gently rub the nozzle surfaces with your fingers if permitted.
- Use a soft brush for remaining visible deposits.
- Rinse the openings with clean water.
- Check for damaged or deformed nozzles.

Avoid needles, knives, pins, and sharp metal objects. They can damage the spray openings and make the problem worse.
Common Shower Head Cleaning Mistakes to Avoid
Avoid these mistakes when cleaning your shower head:
- Using vinegar without checking compatibility: Acidic solutions may damage some finishes.
- Soaking for too long: Prolonged chemical exposure can affect coatings and components.
- Using abrasive scrubbers: These can scratch decorative surfaces.
- Using sharp objects: Metal pins can damage spray openings.
- Applying strong descalers unnecessarily: Always check the manufacturer’s instructions.
- Using bleach unnecessarily: Bleach is not a general-purpose limescale remover.
- Mixing cleaning chemicals: Combining products can create dangerous reactions.
- Ignoring ventilation: Open a window or use an exhaust fan when required by the product label.
- Failing to rinse: Remaining cleaning solution may damage surfaces.
- Applying excessive force: This can damage shower connections and fittings.
- Ignoring leaks: Always inspect the connection after reinstalling a shower head.
For safer cleaning practices, read the household cleaning chemical safety guidance and always follow the instructions printed on cleaning product labels.
Important safety warning: Never mix bleach with vinegar, ammonia, acids, toilet cleaners, or other household cleaning products. These combinations can release dangerous gases. Always use cleaning products separately, follow their labels, and rinse surfaces as directed before switching products.
How Often Should You Clean a Shower Head?
There is no single cleaning schedule that suits every household.
The ideal frequency depends on:
- The hardness of your local water.
- How frequently the shower is used.
- The amount of visible mineral buildup.
- The shower head material and finish.
- The manufacturer’s maintenance instructions.
A practical approach is to wipe the exterior regularly and inspect the spray nozzles periodically.
Clean the shower head whenever you notice visible deposits, uneven spraying, or blocked openings.
Homes with hard water may need more frequent maintenance than homes with softer water.
How to Prevent Mineral Buildup in a Shower Head
Preventing deposits is generally easier than removing heavy buildup.
Use these simple maintenance tips:
- Wipe the shower head exterior with a soft cloth after cleaning the bathroom.
- Inspect spray openings for visible deposits.
- Clean mineral buildup promptly using an approved method.
- Follow the manufacturer’s maintenance recommendations.
- Avoid abrasive cleaning products.
- Maintain good bathroom ventilation.
- Inspect the shower head for changes in water flow.
- Address persistent hard-water problems where appropriate.
A suitable water-softening system may help reduce hard-water mineral deposits, depending on the water supply and system design. However, filtration and water treatment products are not guaranteed to solve every shower head blockage.
When Should You Replace a Shower Head?
Cleaning may not solve every shower head problem.
Consider replacement when you notice:
- Cracked or broken housing.
- Damaged spray openings.
- Persistent leaks from the body.
- Severe internal corrosion.
- Repeated blockages.
- Broken internal components.
- Poor performance that continues despite appropriate cleaning.
If several water fixtures have low pressure, or a replacement shower head does not solve the problem, ask a plumber to inspect the water supply, valves, and plumbing system.
Frequently Asked Questions About Cleaning a Shower Head
1. What is the easiest way to clean a shower head?
The easiest method is to wipe the exterior with a microfiber cloth and use a soft brush to clean visible deposits around the spray nozzles. Choose a compatible cleaning solution when additional mineral removal is needed.
2. Can you clean a shower head with vinegar?
Yes, vinegar can help dissolve certain mineral deposits. However, it should only be used when approved for the shower head’s material and finish. Always follow the manufacturer’s instructions.
3. How do you clean a shower head without removing it?
You can use a suitable plastic bag containing an approved cleaning solution around the fixed shower head. Secure it carefully, follow the recommended contact time, remove the bag, and rinse the fixture thoroughly.
4. How long should you soak a shower head in vinegar?
There is no universal soaking time. The appropriate contact time depends on the material, finish, and manufacturer’s recommendations. Some shower heads should not be exposed to vinegar at all.
5. How do you remove limescale from a shower head?
Use a manufacturer-approved descaling solution, gently clean the affected openings with a soft brush, and rinse thoroughly. Vinegar is an option only for compatible materials and finishes.
6. How do you unclog shower head spray holes?
Gently clean the openings with your fingers or a soft toothbrush if permitted. Avoid needles, pins, and metal tools that could damage the nozzles.
7. Can baking soda clean a shower head?
Baking soda may help with some surface dirt, but it is not a reliable substitute for a suitable descaling product when removing mineral deposits. Avoid abrasive scrubbing, especially on delicate finishes.
8. How often should you clean your shower head?
Cleaning frequency depends on water hardness, shower usage, visible buildup, and manufacturer guidance. Inspect the nozzles regularly and clean when deposits appear.
9. How do you clean a rainfall shower head?
Inspect the complete spray surface, use a compatible cleaning solution if necessary, and gently clean the nozzles with a soft brush. Follow the manufacturer’s instructions for larger or complex models.
10. How do you clean a chrome shower head without damaging it?
Use a soft microfiber cloth and a compatible mild cleaner. Avoid abrasive materials and acidic solutions unless the manufacturer specifically approves them.
11. Why does my shower head have low water pressure?
Mineral deposits may restrict water flow, but low pressure can also result from plumbing restrictions, faulty valves, or supply problems. If other fixtures are affected, have the plumbing system checked.
12. Can mineral deposits permanently damage a shower head?
Heavy deposits can affect performance and may contribute to corrosion or damage over time. Whether cleaning can restore the fixture depends on the severity of the buildup and the condition of its components.
13. How do you clean a shower head with rubber nozzles?
Gently rub flexible nozzles with your fingers if permitted, then rinse away loosened deposits. Use a soft brush for remaining buildup and avoid sharp tools.
14. Should you remove a shower head before cleaning it?
Not always. Surface cleaning and an approved bag method may be sufficient. Removal can help access certain internal components, but it should only be done when the fixture is designed to be removed safely.
15. When should you replace a shower head?
Replace it if the housing is cracked, spray nozzles are damaged, internal components are broken, or persistent problems remain after suitable cleaning.
Conclusion
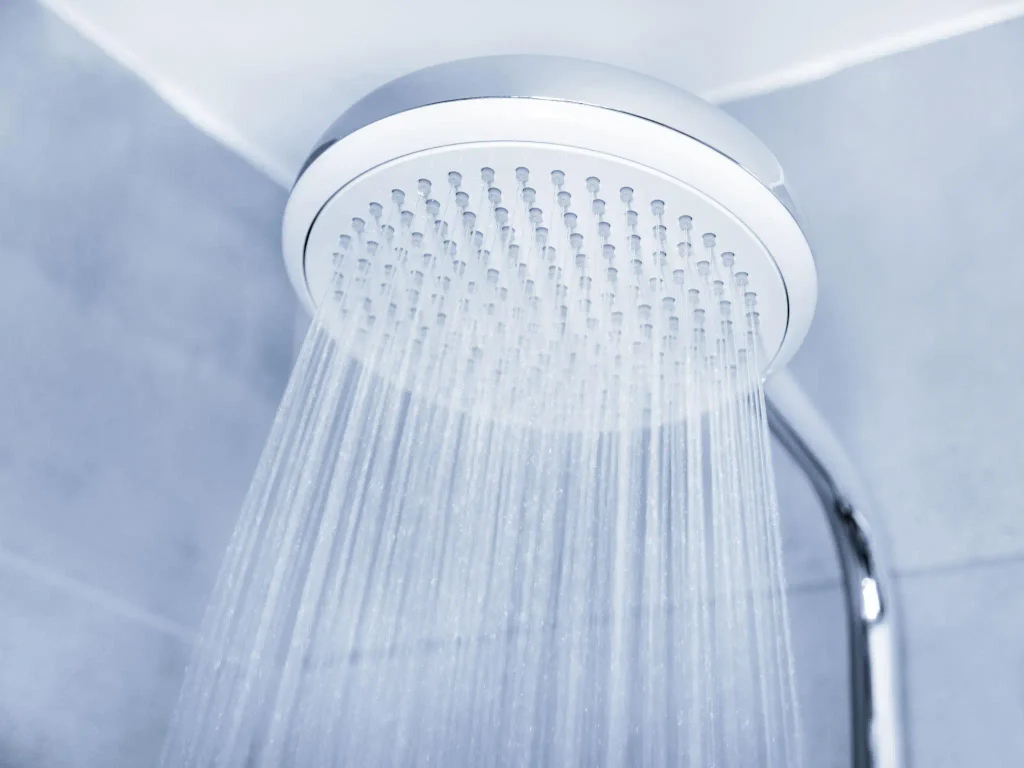
Regular shower head cleaning helps maintain a comfortable shower, remove visible mineral deposits, and keep bathroom fixtures in good condition.
Learning how to clean a shower head starts with identifying its material and finish, choosing a compatible cleaning solution, and removing buildup gently. Whether you have a fixed, handheld, chrome, or rainfall shower head, always follow the manufacturer’s care instructions.
Avoid harsh chemicals, abrasive tools, and unnecessary disassembly. Rinse cleaning solutions thoroughly and check for leaks after reinstalling removable components.
With regular inspection and suitable maintenance, you can prevent heavy mineral buildup and keep your shower head working properly.
For more bathroom maintenance solutions, explore our guide on how to fix a running toilet and learn how to handle common toilet problems.
For more practical bathroom cleaning and home maintenance advice, explore the helpful guides on Fix The Annoying.