
Bathroom mold is a common problem in homes, apartments, and rental properties. It often appears as black, green, grey, or dark patches on walls, ceilings, grout, and areas around showers and bathtubs.
The main reason bathroom mold develops is excess moisture. Hot showers, poor ventilation, condensation, leaking pipes, and damp wall materials can create conditions that encourage mold growth.
If you have noticed dark spots or musty smells in your bathroom, learning how to remove mold from bathroom walls safely can help you deal with small surface problems before they become more serious.
However, removing visible mold is only part of the solution. You also need to identify and correct the moisture problem responsible for its growth.
In this guide, you will learn how to identify bathroom mold, choose suitable cleaning products, clean small areas safely, protect different wall surfaces, and prevent mold from returning.
Safety note: The DIY cleaning instructions below are intended for small areas of surface mold on suitable, cleanable materials. Extensive growth, hidden contamination, and damaged building materials require additional assessment.
Why Does Mold Grow on Bathroom Walls?
Mold is a type of fungus that grows in damp environments. Bathrooms are particularly vulnerable because showers and baths regularly introduce moisture into the air.
When moisture remains on walls, ceilings, grout, or other surfaces, mold can develop.
Here are some common causes.
1. High Bathroom Humidity
Hot showers and baths release moisture into the air. Without adequate ventilation, humidity can remain elevated long after someone finishes bathing.
This creates favourable conditions for mold growth.
2. Poor Bathroom Ventilation
An exhaust fan helps remove humid air from the bathroom.
If the fan is missing, damaged, undersized, or incorrectly vented, moisture may accumulate on walls and ceilings.
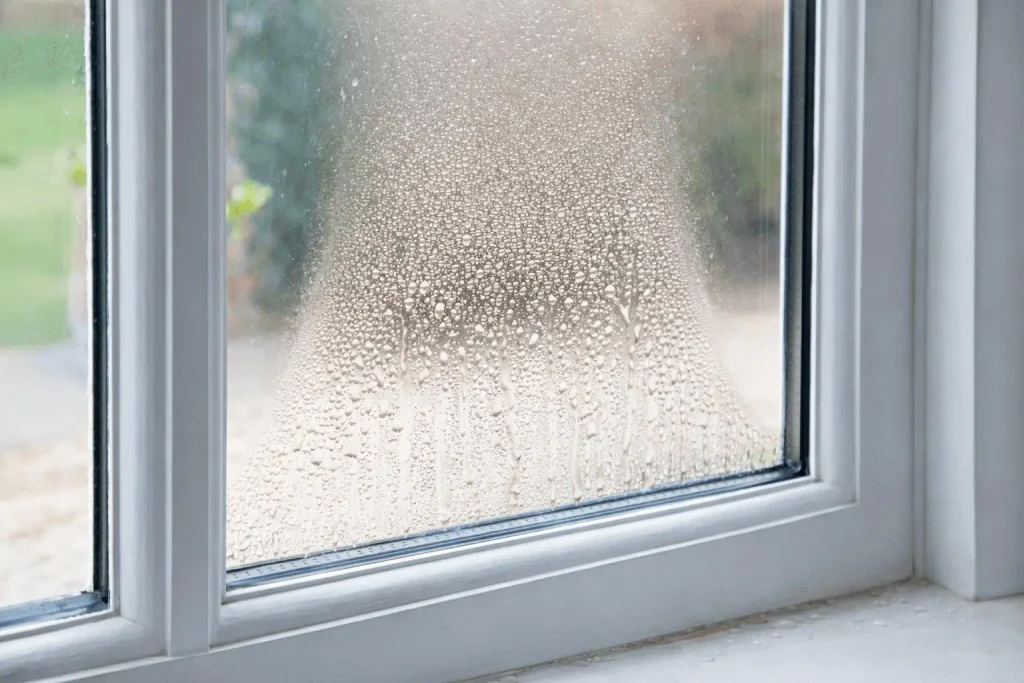
3. Condensation on Cold Walls
Warm, humid bathroom air can come into contact with colder wall surfaces.
This temperature difference can cause water droplets to form on the surface, creating persistent dampness.
4. Water Leaks
Leaking taps, shower connections, pipes, and damaged plumbing fittings can introduce moisture into surrounding walls.
Even a small leak can create a long-term damp area if it remains unnoticed.
5. Damaged Grout and Caulking
Cracked grout and deteriorated bathtub caulking can allow water to enter gaps around showers and bathtubs.
Moisture trapped behind tiles can eventually damage surrounding materials and encourage mold growth.
6. Damp Wall Materials
Drywall, plasterboard, wallpaper, and other porous materials can absorb moisture.
If they remain damp, mold may grow within or behind the material rather than only on the visible surface.
Important: Repeatedly cleaning visible mold without fixing the moisture source is unlikely to solve the problem permanently.
How to Identify Mold on Bathroom Walls
Bathroom mold does not always look the same. Its appearance can vary depending on the surface, moisture conditions, and type of growth.
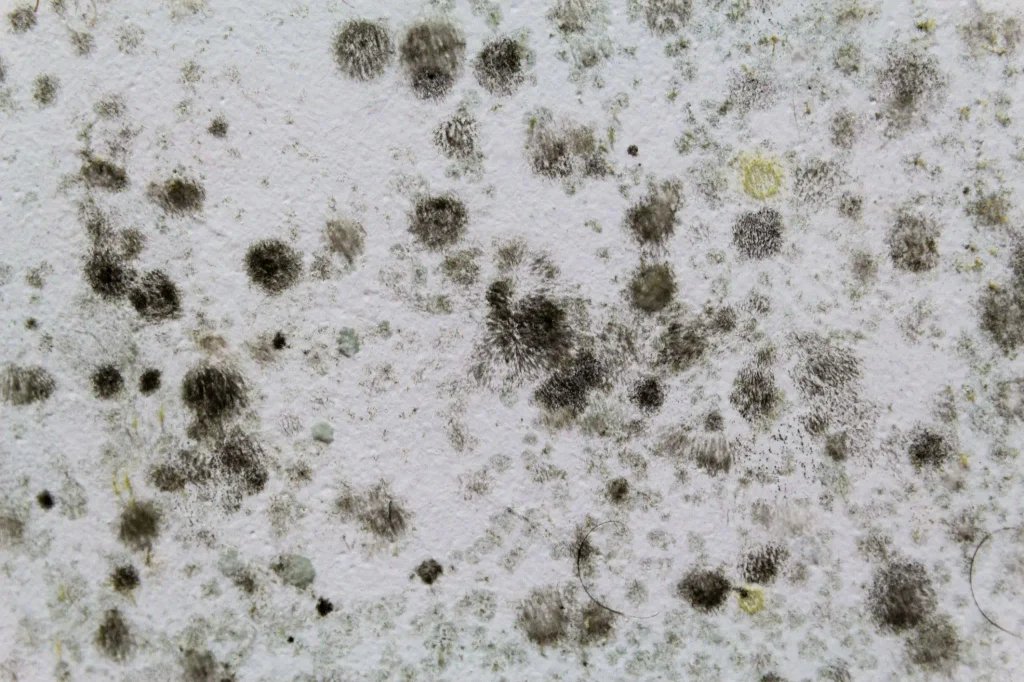
Look for these warning signs:
- Black spots: Small dark patches appearing on walls, ceilings, or corners.
- Green or grey patches: Discoloured areas that may indicate mold growth.
- Musty smells: An earthy or unpleasant smell, even when visible mold is limited.
- Peeling paint: Paint that bubbles, cracks, or separates from the wall.
- Damp surfaces: Areas that remain wet or discoloured.
- Recurring stains: Marks that return after ordinary cleaning.
- Mold around windows: Growth near window frames where condensation collects.
Is Every Black Stain Black Mold?
No. A black mark on a bathroom wall is not automatically toxic black mold.
Dirt, soap residue, mineral deposits, and other stains can also appear dark.
You cannot reliably identify a mold species or determine its toxicity simply by looking at its colour.
If the cause or extent of the problem is uncertain, consider getting a qualified professional to assess it.
Is Bathroom Wall Mold Dangerous?
Indoor mold can affect air quality and may cause health problems in some people.
Possible reactions include:
- Sneezing and nasal irritation.
- Coughing.
- Throat irritation.
- Itchy or watery eyes.
- Wheezing.
- Worsening asthma symptoms.
- Other allergic reactions.
People with asthma, allergies, respiratory sensitivities, or weakened immune systems may need additional precautions.
The health effects vary between individuals and depend on exposure conditions.
Avoid touching or disturbing visible mold unnecessarily. If you have health concerns, seek advice from a healthcare professional.
Health Canada provides additional information about mold exposure and potential health effects.
Tools and Materials Needed to Remove Mold from Bathroom Walls
Before starting, prepare the appropriate cleaning supplies and protective equipment.
| Tool or material | Purpose |
|---|---|
| Suitable cleaning product | Removes mold from compatible surfaces |
| Soft cleaning cloth | Gently cleans affected areas |
| Soft-bristle brush | Helps clean suitable textured surfaces |
| Bucket | Holds cleaning solution |
| Disposable paper towels | Removes excess moisture |
| Cleaning gloves | Protects hands |
| Safety goggles | Protects eyes |
| Well-fitting N95 respirator | Provides respiratory protection where appropriate |
| Waste bags | Holds disposable contaminated materials |
| Protective sheeting | Helps protect nearby belongings when appropriate |
| Ventilation arrangements | Helps remove humid air and cleaning fumes |
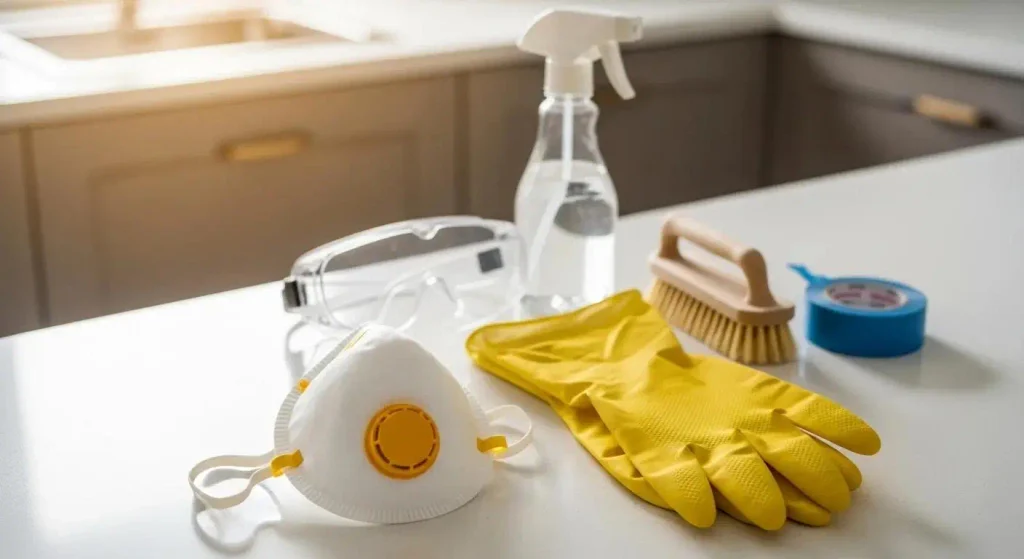
Protective equipment matters. Health Canada’s guidance recommends safety goggles, a well-fitting disposable N95 respirator, and household gloves for mold cleanup.
People who are particularly susceptible to mold exposure, including those with respiratory conditions, should stay away from the cleaning area.
Do not assume an ordinary cloth face covering provides the same protection as a properly fitted respirator.
Health Canada’s guide to addressing moisture and mold indoors explains recommended protective equipment, cleaning procedures, and moisture-control measures.
How to Remove Mold from Bathroom Walls Safely: Step-by-Step Guide
The appropriate cleaning method depends on the affected surface, the amount of mold, and whether moisture has damaged the underlying material.
For small areas of surface mold on suitable, washable surfaces, follow these steps.
Step 1. Assess the Mold-Affected Area
Start by inspecting the affected wall.
Check:
- How many mold patches are visible?
- Is the affected wall damp?
- Is paint peeling or bubbling?
- Are there cracks in nearby tiles or grout?
- Is there a plumbing leak?
- Does the area have a persistent musty smell?
- Could mold be growing behind the wall?
Do not begin DIY cleaning if the wall is soft, badly damaged, or extensively contaminated.
Also investigate any signs of water entering from behind the tiles or through plumbing connections.
If the affected material is deteriorating, professional assessment is a safer option.
If you also notice slow drainage or water collecting around your shower, read our guide on how to fix a clogged shower drain.
Step 2. Prepare the Bathroom
Before cleaning, prepare the surrounding area.
- Remove toiletries, towels, and nearby belongings.
- Keep children and pets away.
- Protect nearby items if appropriate.
- Read the cleaning product instructions.
- Put on suitable gloves, goggles, and respiratory protection.
- Arrange safe ventilation.
Open an exterior window if conditions permit.
If you use an exhaust fan, make sure it vents outdoors and does not discharge contaminated air into another room or an attic.
Avoid positioning portable fans so they blow directly across moldy surfaces and spread contaminated dust.
Step 3. Choose a Suitable Mold Cleaning Product
Choose a product that is compatible with the affected surface.
For small areas on washable surfaces, an unscented dish detergent solution and water may be sufficient.
Health Canada recommends cleaning suitable washable surfaces using an unscented soap solution and drying them completely.
Before applying a product:
- Read the manufacturer’s instructions.
- Check the surface compatibility.
- Follow the recommended application method.
- Test an inconspicuous area if appropriate.
- Never combine different cleaning products.
Not every household cleaner is suitable for painted walls, grout, drywall, or other bathroom materials.
Step 4. Clean Small Areas of Surface Mold
Once you have confirmed that the surface is suitable for cleaning, follow the product instructions.
- Prepare the cleaning solution as directed.
- Apply it to a soft cloth or cleaning sponge.
- Gently clean the affected surface.
- Avoid aggressive scrubbing.
- Remove cleaning residue according to the product instructions.
- Dispose of used disposable cleaning materials appropriately.

For suitable hard surfaces, detergent and water can remove surface mold.
Avoid soaking drywall or other moisture-sensitive materials.
If mold has penetrated a porous material or the material is damaged, surface cleaning may not be sufficient. The affected material may need removal and replacement.
Chemical safety warning: Never mix bleach with vinegar, ammonia, acids, or other cleaning products. Dangerous chemical reactions and toxic fumes can occur.
Step 5. Dry the Wall Completely
Drying is essential because remaining moisture can encourage mold to return.
After cleaning:
- Remove excess water using a clean cloth.
- Improve bathroom ventilation.
- Allow the cleaned surface to dry.
- Check for remaining dampness.
- Investigate moisture that continues to return.
Do not use a universal drying time. Drying depends on the material, temperature, humidity, and ventilation.
If the wall remains damp, investigate the underlying cause rather than repeatedly cleaning it.
Step 6. Inspect the Area After Cleaning
Once the surface is dry, inspect it carefully.
Check for:
- Remaining visible mold.
- Peeling or damaged paint.
- Persistent dampness.
- Musty smells.
- Discolouration that returns.
- Signs of water leaking behind the wall.
Removing visible marks does not prove that hidden mold or the underlying moisture problem has been eliminated.
If mold returns, investigate the source of moisture and consider professional assistance.
How to Remove Mold from Different Bathroom Wall Surfaces
Different bathroom materials require different cleaning methods. A product that works on ceramic tiles may damage painted walls or other finishes.
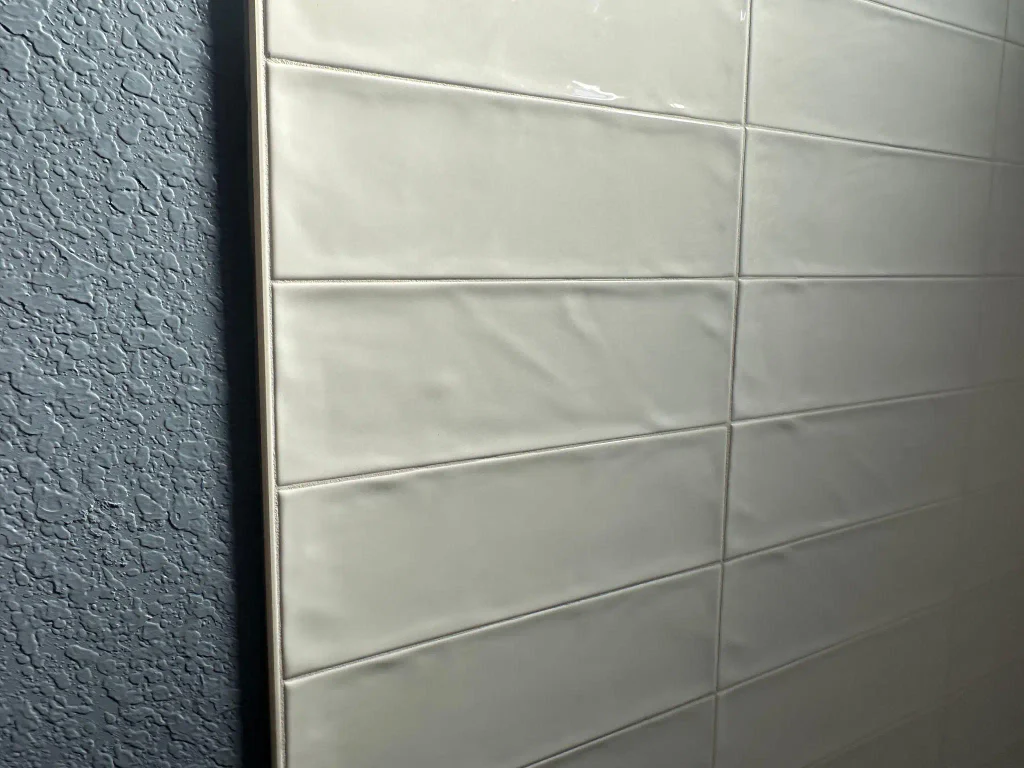
Painted Bathroom Walls
Painted walls require gentle cleaning.
- Use a compatible mild cleaning solution.
- Apply it using a soft cloth.
- Avoid excessive water.
- Do not scrub aggressively.
- Check for bubbling or peeling paint.
If mold is beneath the paint, cleaning only the outer surface may not solve the problem.
Damaged or contaminated wall materials may need professional assessment and replacement.
Ceramic or Porcelain Bathroom Tiles
Intact glazed tiles are generally easier to clean than porous surrounding materials.
For small areas:
- Apply a compatible cleaning solution.
- Gently wipe the affected tile.
- Clean the surface without damaging the finish.
- Remove residue as directed.
- Dry the tiles.
Pay particular attention to the grout joints, where moisture and dirt can accumulate.
Bathroom Grout
Grout can retain moisture and develop dark staining or mold growth.
Use a grout-compatible cleaning product and a soft-bristle brush.
Avoid harsh scrubbing that damages grout joints.
If grout is cracked, missing, or deeply damaged, cleaning alone may not be enough. Repair or replacement may be necessary.
Drywall and Plaster Walls
Drywall and plaster require additional care because they may absorb moisture.
Health Canada’s guidance recommends cleaning wall surfaces with a damp cloth and avoiding excessive water.
If mold is underneath paint or has affected the drywall itself, the affected material may need to be removed and replaced.
Do not rely on surface cleaning when the wall is soft, deteriorating, or extensively contaminated.
Seek professional assessment if hidden growth is suspected.
Common Mistakes to Avoid When Removing Bathroom Mold
Some cleaning mistakes can make a mold problem worse or create unnecessary safety risks.
| Common mistake | Why to avoid it |
|---|---|
| Mixing bleach and vinegar | Can release dangerous chlorine gas |
| Mixing bleach and ammonia | Can produce toxic fumes |
| Using several cleaners together | May cause hazardous chemical reactions |
| Scrubbing aggressively | Can damage surfaces and spread contaminated material |
| Ignoring ventilation | Allows moisture and cleaning fumes to accumulate |
| Painting over mold | Hides the problem without correcting it |
| Ignoring plumbing leaks | Allows moisture to continue feeding mold growth |
| Cleaning damaged drywall yourself | May disturb hidden contamination |
| Ignoring recurring mold | May indicate unresolved water damage |
One particularly important mistake is painting over visible mold.
Paint does not correct the moisture problem or reliably eliminate mold growth. The surface needs appropriate cleaning, drying, and repair before repainting is considered.
How to Prevent Mold from Returning on Bathroom Walls
Preventing bathroom mold is easier when you control excess moisture.

Here are practical ways to reduce the chances of mold returning.
1. Improve Bathroom Ventilation
Use an exhaust fan during showers and baths.
Make sure it is working properly and venting outdoors.
2. Keep the Exhaust Fan Running After Showering
Continue using the fan after bathing to help remove remaining moisture.
Health Canada’s bathroom guidance recommends keeping the exhaust fan running for at least 30 minutes after a shower or bath.
3. Open Windows When Appropriate
If outdoor conditions allow, opening a window can improve air circulation and help remove humid air.
4. Wipe Excess Water from Surfaces
Use a squeegee or dry cloth to remove excess moisture from shower walls, tiles, and bathtub surrounds.
5. Repair Plumbing Leaks
Check taps, pipes, shower connections, and plumbing fittings.
Repair leaks promptly instead of allowing water to enter surrounding materials.
6. Maintain Bathroom Grout and Caulking
Inspect grout joints and bathtub seals for cracks or deterioration.
Repair damaged areas to reduce water penetration.
7. Address Condensation
If condensation repeatedly forms on walls or windows, investigate the ventilation and humidity conditions.
A dehumidifier may help in persistently damp spaces.
8. Keep Bathroom Surfaces Clean
Regular cleaning helps remove soap residue, dirt, and other buildup.
However, ordinary cleaning should not replace proper moisture control.
9. Inspect Ceilings and Corners
Check less visible areas, especially near showers, windows, and ceilings.
Look for recurring stains, peeling paint, or musty smells.
10. Control Indoor Humidity
Health Canada recommends maintaining indoor relative humidity between 30% and 50%.
A hygrometer can help you monitor humidity levels.
Remember: The most effective bathroom mold prevention strategy is to correct moisture problems, improve ventilation, and keep surfaces dry.
When Should You Call a Professional for Bathroom Mold?
Not every mold problem is suitable for DIY cleaning.
Small surface patches on washable materials may be manageable with appropriate precautions. However, larger or hidden contamination requires additional care.
Consider professional help if:
- Mold covers a large area.
- Several areas of the bathroom are affected.
- Mold keeps returning after cleaning.
- You suspect mold behind tiles or walls.
- Drywall is soft, damaged, or deteriorating.
- There is a persistent plumbing leak.
- Water damage is present behind bathroom fixtures.
- Strong musty smells remain unexplained.
- Mold may have entered the ventilation system.
- Someone in the household is particularly vulnerable to mold exposure.
For additional guidance on cleaning small mold-affected areas and deciding when professional assistance is needed, review the EPA’s mold cleanup recommendations
How Much Mold Is Too Much to Clean Yourself?
The US Environmental Protection Agency (EPA) uses approximately 10 square feet (about 0.93 square metres) as a general guideline for considering professional assistance.
This is a screening guideline, not a universal safety boundary.
Health Canada’s classification also distinguishes small, medium, and extensive mold contamination. Its guidance recommends professional assessment for large areas, particularly when the cause is unclear or mold repeatedly returns.
Before restoration work begins, the underlying water or moisture problem must be corrected.
Frequently Asked Questions About Removing Mold from Bathroom Walls
1. What is the easiest way to remove mold from bathroom walls?
For small areas of surface mold on suitable washable surfaces, use a compatible detergent solution, a soft cloth, and appropriate protective equipment. Clean gently and dry the surface completely.
2. What causes black mold on bathroom walls?
Common contributing conditions include high humidity, poor ventilation, condensation, plumbing leaks, and persistent dampness. However, the colour of a stain cannot identify a particular mold species.
3. Can vinegar remove mold from bathroom walls?
Vinegar is sometimes used as a household cleaning option, but it is not a guaranteed solution for every surface or mold problem. Choose a cleaning method compatible with the affected material instead.
Never mix vinegar with bleach.
4. Can baking soda remove bathroom wall mold?
Baking soda can be used in some surface-cleaning situations, but it is not a universal mold-removal treatment. Health Canada mentions baking soda or a small amount of unscented soap solution for cleaning suitable wall surfaces with a damp cloth.
5. Is bleach safe for removing mold from bathroom walls?
Bleach is not recommended as a routine mold-cleaning method by the EPA. It may also damage certain surfaces.
Never mix bleach with vinegar, ammonia, acids, or other cleaning products. Follow all product instructions.
6. How do I remove mold from painted bathroom walls?
Use a compatible cleaning product and a soft, damp cloth for small areas of surface mold. Avoid excessive moisture and aggressive scrubbing.
If mold is beneath the paint or the wall is damaged, professional assessment may be necessary.
7. How do I remove mold from bathroom tiles?
For small areas on intact glazed tiles, use an appropriate cleaning solution and gently wipe the affected surface. Pay attention to grout joints and dry the area thoroughly.
8. Can bathroom mold grow behind walls?
Yes. Mold can develop behind drywall, tiles, and other building materials when moisture enters hidden spaces.
Persistent musty smells, recurring dampness, and water damage may indicate hidden growth.
9. Why does mold keep coming back on bathroom walls?
Recurring mold often means the original moisture problem has not been corrected. Poor ventilation, leaks, condensation, and damp building materials can all contribute.
10. How can I prevent mold from growing in my bathroom?
Use an exhaust fan, improve ventilation, wipe wet surfaces, repair leaks, maintain grout and caulking, and monitor indoor humidity.
11. Should I paint over mold on bathroom walls?
No. Painting over mold does not solve the underlying problem. Clean and dry the surface appropriately, address the moisture source, and repair damaged materials before repainting.
12. When should I hire a professional mold removal service?
Seek professional help when mold growth is extensive, recurring, hidden, or associated with damaged building materials or persistent water leaks.
Conclusion
Learning how to remove mold from bathroom walls safely involves more than simply cleaning dark spots from a surface.
You need to identify the moisture source, choose an appropriate cleaning method, use protective equipment, and understand which wall materials can be safely cleaned.
Small areas of surface mold on suitable washable surfaces may be manageable with careful cleaning. However, extensive growth, damaged drywall, hidden contamination, and recurring mold require further investigation.
Most importantly, control bathroom moisture to prevent the same problem from returning.
Improve ventilation, repair leaks, maintain grout and caulking, and keep bathroom surfaces dry.
For more practical bathroom cleaning, plumbing, and home maintenance advice, explore the other guides on Fix The Annoying.