
Kitchen cabinets are exposed to cooking grease, food splashes, fingerprints, dust, moisture, and everyday dirt. Over time, these substances can create a sticky layer that makes cabinet doors look dull and dirty.
Cabinets near stovetops, sinks, and cooking areas often collect grease faster than other surfaces. Even cabinet handles and decorative edges can develop stubborn residue from regular use.
However, cleaning kitchen cabinets requires more care than cleaning ordinary countertops. Strong degreasers, abrasive sponges, excessive water, and unsuitable household cleaners can scratch surfaces, remove protective coatings, cause discoloration, or damage cabinet edges.
The good news is that you do not need aggressive cleaning products to maintain most kitchen cabinets.
In this guide, you’ll learn how to clean kitchen cabinets without damaging the finish, including gentle methods for wooden, painted, laminate, thermofoil, and veneer cabinets. You’ll also discover how to remove stubborn grease, prevent sticky buildup, and maintain clean cabinets with a simple routine.
Regular cleaning is an important part of kitchen maintenance, so follow our kitchen maintenance checklist to keep cabinets, countertops, appliances, and other kitchen surfaces in good condition.
Important: Always check your cabinet manufacturer’s cleaning instructions before using any cleaning solution. Different finishes can react differently to the same product.
Why Do Kitchen Cabinets Get Dirty and Greasy?
Kitchen cabinets become dirty because they are constantly exposed to cooking activities, moisture, food particles, and frequent handling.
Understanding the causes makes it easier to choose an appropriate cleaning method.
1. Cooking Oil and Grease Particles
Cooking releases tiny oil particles into the air. These particles can settle on nearby cabinet doors, particularly those above and beside stovetops.
When grease combines with dust, it creates a sticky coating that becomes increasingly difficult to remove.
2. Steam and Moisture
Steam from boiling water, dishwashing, and cooking can settle on cabinet surfaces.
Repeated moisture exposure may affect wood, MDF, veneer, and cabinet edges, especially when water enters joints or damaged areas.
3. Food Splashes and Spills
Oil, sauces, milk, and other food substances can splash onto nearby cabinet doors.
If these spills are not cleaned promptly, they may leave stains or sticky residue.
4. Fingerprints and Everyday Handling
Cabinet handles and doors collect natural skin oils, fingerprints, and dirt from everyday use.
These marks are particularly noticeable on dark, glossy, and painted cabinet finishes.
5. Dust Sticking to Greasy Surfaces
Dust settles on almost every kitchen surface. When it comes into contact with grease, it sticks to cabinet doors instead of being easily removed with a dry cloth.
6. Poor Kitchen Ventilation
Without adequate ventilation, cooking particles and moisture can remain in the kitchen air longer.
An exhaust fan or range hood can help reduce the amount of grease settling on surrounding cabinets.
7. Cleaning Product Residue
Using too much soap or an unsuitable cleaning product can leave residue behind.
This residue may attract additional dust and make cabinet surfaces appear streaky.
8. Infrequent Cabinet Maintenance
When small spills and grease spots are ignored, they gradually become harder to clean.
Regular light cleaning is generally easier than removing months of accumulated grease.
Identify Your Kitchen Cabinet Material Before Cleaning
Before choosing a kitchen cabinet cleaner, identify the material and finish of your cabinets.

Two cabinets may look similar but require different cleaning methods. A solution suitable for laminate may not be appropriate for a delicate painted or natural wood finish.
Cabinet manufacturers may recommend specific cleaning products and techniques for different finishes, so always check the cabinet manufacturer cleaning recommendations before selecting a cleaner
Solid Wood Cabinets
Solid wood cabinets are made from natural timber and commonly feature protective coatings such as varnish, lacquer, paint, or other finishes.
Cleaning considerations:
- Use a soft microfiber cloth.
- Use a small amount of mild cleaning solution if the finish permits.
- Avoid soaking the surface.
- Wipe spills and moisture immediately.
- Pay particular attention to joints, edges, and unfinished areas.
Excessive water can penetrate wood and contribute to swelling, discoloration, or finish deterioration.
Painted Kitchen Cabinets
Painted cabinets have a coating that provides color and protection.
They can collect fingerprints, food stains, and grease, especially around handles.
Cleaning considerations:
- Use a soft, non-abrasive microfiber cloth.
- Start with a lightly dampened cloth.
- Use mild dish soap only if compatible with the paint finish.
- Avoid scrubbing painted surfaces aggressively.
- Dry with a clean towel.
Abrasive cleaners can dull paint, while aggressive scrubbing may cause scratches or peeling.
Laminate Cabinets
Laminate cabinets have a decorative surface layer attached to a supporting material.
They are commonly available in wood-grain, matte, and glossy designs.
Cleaning considerations:
- Use a soft cloth or non-abrasive sponge.
- Clean with a mild solution approved for the laminate.
- Avoid excessive moisture around seams.
- Do not scrape stubborn marks with sharp tools.
- Inspect damaged edges before cleaning.
If laminate edges are lifting or damaged, avoid allowing water to enter underneath the surface.
Thermofoil Cabinets
Thermofoil cabinets have a vinyl-like decorative layer bonded to an underlying cabinet panel.
They are often smooth and easy to wipe clean.
Cleaning considerations:
- Use a soft microfiber cloth.
- Use a mild, compatible cleaning solution.
- Avoid excessive heat and steam.
- Do not pull or scrub lifting edges.
- Avoid abrasive pads and unsuitable solvents.
Excessive heat can weaken the bond between the decorative layer and the cabinet substrate.
Veneer Cabinets
Wood veneer cabinets have a thin layer of real wood attached to an engineered or other supporting material.
Because the decorative wood layer is relatively thin, aggressive cleaning can damage it.
Cleaning considerations:
- Remove dust with a soft microfiber cloth.
- Use minimal moisture.
- Avoid abrasive scrubbing.
- Dry surfaces immediately.
- Take extra care around seams and edges.
Always follow the manufacturer’s instructions for the specific veneer finish.
Essential Cleaning Supplies for Kitchen Cabinets
You do not need an expensive collection of cleaning products to maintain your cabinets.
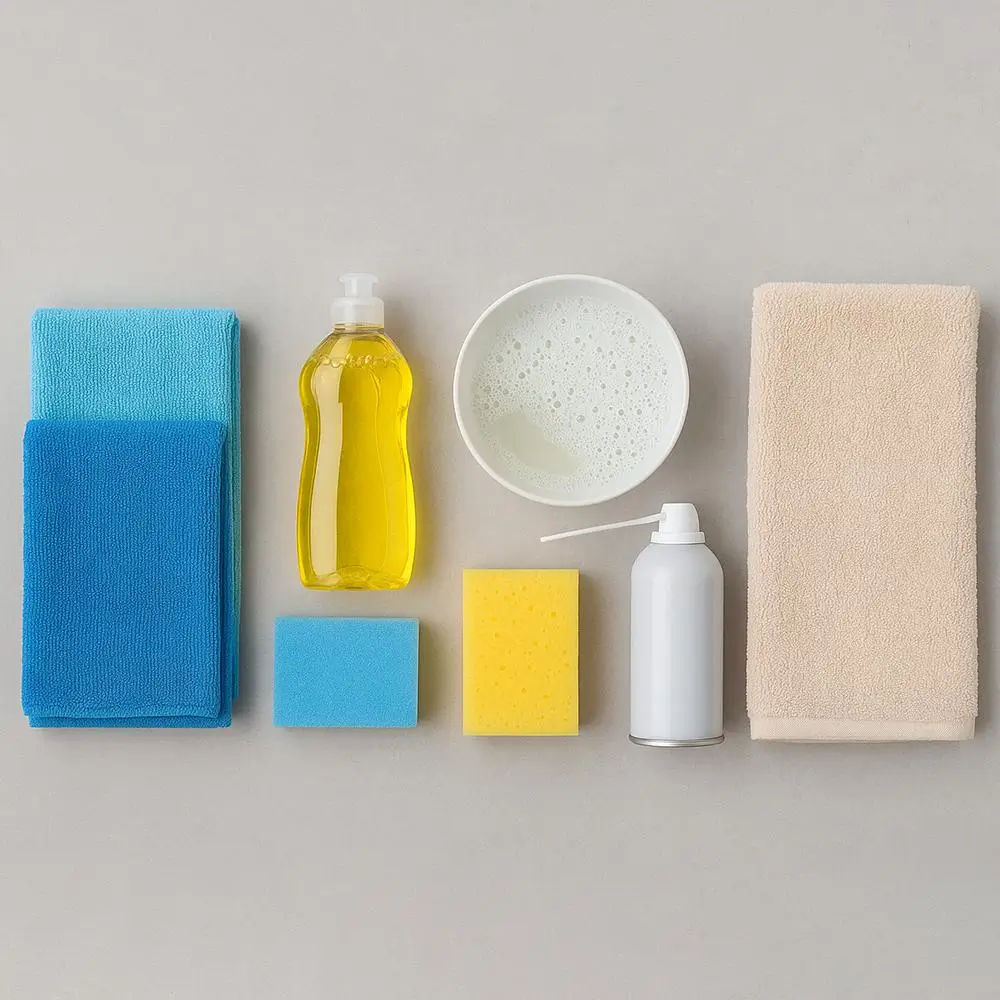
The following basic supplies are useful for gentle cleaning.
| Cleaning supply | Purpose |
|---|---|
| Microfiber cloths | Remove dust, fingerprints, and light dirt |
| Soft sponge | Clean compatible cabinet surfaces |
| Mild dish soap | Help loosen everyday grease |
| Lukewarm water | Prepare a gentle cleaning solution |
| Spray bottle | Apply a controlled amount of solution |
| Dry microfiber towel | Remove remaining moisture |
| Soft-bristled brush | Clean corners and decorative details |
| Small cleaning brush | Reach around handles and edges |
| Cabinet-safe cleaner | Address stubborn residue when necessary |
Cleaning tip: Keep separate cloths for cleaning and drying. A cloth previously used on greasy stovetops may spread grease onto cabinet doors.
Avoid steel wool, abrasive scouring pads, rough brushes, and powdered cleansers.
How to Clean Kitchen Cabinets Without Damaging the Finish – Step-by-Step Method
Follow this gentle cleaning process to remove everyday dirt and grease while protecting your cabinet finish.
Step 1. Remove Items from the Cabinets
Start by removing objects from the cabinet surfaces and clearing the interiors you intend to clean.
Move nearby appliances or decorative items if necessary to create enough working space.
This prevents accidental spills and makes it easier to reach corners.
Step 2. Identify the Cabinet Finish
Check whether your cabinets are made from solid wood, painted wood, laminate, thermofoil, veneer, or another material.
Look for manufacturer care instructions.
Before using any cleaning solution, test it on a small, hidden area.
Allow the tested area to dry and inspect it for discoloration, dullness, swelling, or other changes.
Step 3. Remove Loose Dust and Dirt
Use a clean, dry microfiber cloth to remove loose dust.
Wipe gently from the upper parts of the cabinets toward the lower sections.
Pay attention to:
- Cabinet door frames.
- Decorative grooves.
- Upper edges.
- Corners.
- Areas around handles.
Removing loose dirt first helps prevent unnecessary rubbing.
Step 4. Prepare a Gentle Cleaning Solution
For compatible finishes, mix a small amount of mild dish soap with lukewarm water.
Avoid making the solution excessively soapy.
You do not need a universal measurement because different products and finishes have different requirements.
Check the manufacturer’s cleaning instructions before using the solution.
Step 5. Clean Cabinet Doors and Frames
Dampen a microfiber cloth with the cleaning solution.

Wring it out thoroughly so it is damp rather than dripping.
Gently wipe the cabinet doors, frames, and other accessible surfaces.
Work in small sections instead of applying cleaning solution to the entire kitchen at once.
Avoid allowing water to collect around joints, seams, and edges.
Step 6. Remove Grease and Sticky Residue
Pay particular attention to areas around cooking equipment and cabinet handles.
For fresh grease on a compatible finish:
- Dampen a clean microfiber cloth with the mild cleaning solution.
- Place it against the affected area briefly.
- Wipe gently without applying excessive pressure.
- Repeat if necessary.
- Use a cabinet-compatible cleaner if the residue remains.
Never scrape grease with a knife or sharp object.
Step 7. Clean Cabinet Handles and Corners
Cabinet handles, knobs, and decorative edges often collect concentrated dirt.
Use a soft cloth or small soft-bristled brush to clean around these areas.
If handles can be removed safely, you can clean the hardware separately according to its manufacturer’s instructions.
Avoid allowing cleaning liquid to enter screw holes or joints.
Step 8. Wipe Away Cleaning Residue
If your cabinet finish permits it, use a separate cloth lightly dampened with clean water to remove remaining soap residue.
Do not saturate the cabinet surface.
Check the manufacturer’s recommendations before rinsing any particular finish.
Step 9. Dry Cabinets Thoroughly
Use a clean, dry microfiber towel to remove remaining moisture.
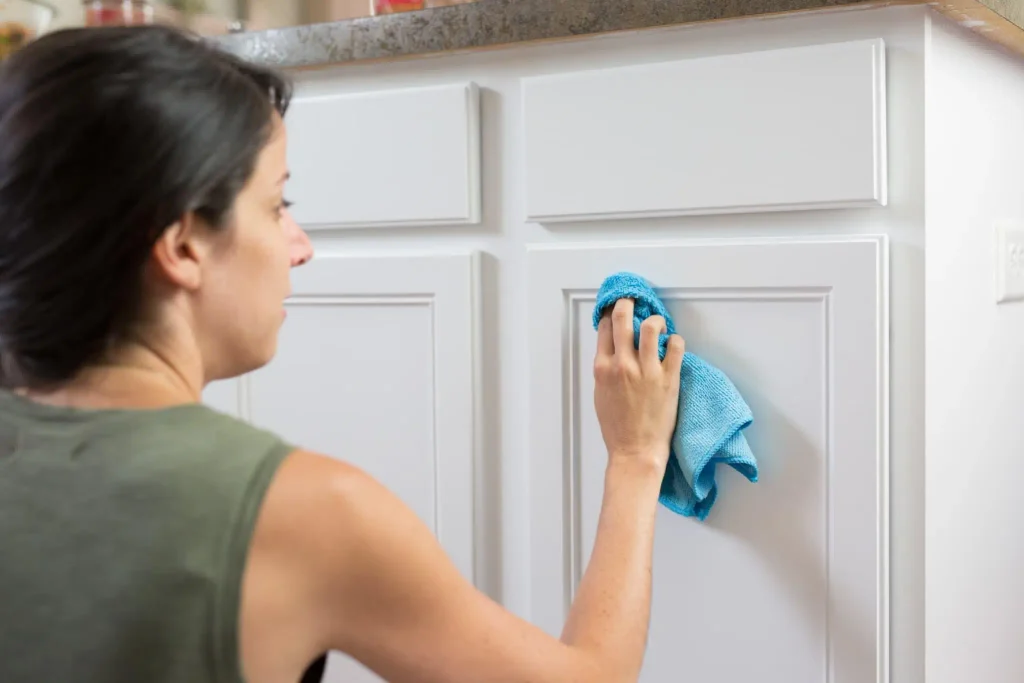
Pay extra attention to:
- Cabinet edges.
- Door joints.
- Decorative grooves.
- Corners.
- Areas around handles.
- Seams and exposed panel edges.
Leaving moisture on these areas can contribute to swelling, peeling, and other damage.
Step 10. Clean Cabinet Interiors When Necessary
Remove crumbs, dust, and food particles from cabinet interiors.
Start with a dry cloth or suitable vacuum attachment.
For compatible interior surfaces, use a lightly dampened cloth to clean small marks.
Dry the surface before replacing dishes, containers, or stored items.
Avoid excessive water, especially around shelf edges and joints.
Use a clean, soft cloth and a compatible mild cleaning solution, following the gentle cabinet cleaning recommendations provided by your cabinet manufacturer.
How to Remove Grease from Kitchen Cabinets Safely
Kitchen grease can be difficult to remove because cooking oils combine with dust and other airborne particles.
The best approach is to loosen the residue gradually rather than scrubbing aggressively.

Grease Around Cabinet Handles
Handles are touched frequently and can develop a sticky layer.
- Apply a little mild cleaning solution to a soft cloth.
- Wipe around the handle and surrounding surface.
- Use a soft brush for narrow spaces.
- Remove residue with a clean cloth if appropriate.
- Dry the area thoroughly.
Grease Near the Stovetop
Cabinet doors close to cooking equipment may have heavier grease deposits.
Use a finish-compatible cabinet cleaner or mild soap solution.
Work on small sections, allowing the cleaning cloth to loosen the residue before wiping.
Do not use strong oven cleaners or industrial degreasers unless the cabinet manufacturer explicitly approves the product.
Sticky Cabinet Doors
Sticky cabinet doors may have a combination of cooking grease, food residue, and old cleaning product buildup.
Use a clean microfiber cloth and a compatible mild cleaning solution.
Repeat gentle wiping instead of increasing pressure.
Old Grease Buildup
Old grease may not respond immediately to ordinary cleaning.
Choose a cabinet-safe degreasing product according to the cabinet manufacturer’s instructions.
Follow the product label, test an inconspicuous area, and avoid prolonged contact unless specifically instructed.
If the grease has affected the finish itself, cleaning may not restore the original appearance. Professional refinishing may be necessary.
How to Clean Different Kitchen Cabinet Finishes Safely
The following comparison provides a quick reference for common cabinet materials.
| Cabinet material | Gentle cleaning approach | Important precaution |
|---|---|---|
| Solid wood | Soft cloth and compatible mild soap solution | Avoid soaking and dry immediately |
| Painted wood | Lightly damp microfiber cloth | Avoid abrasive scrubbing |
| Laminate | Soft cloth and compatible mild cleaner | Protect seams and damaged edges |
| Thermofoil | Soft cloth and mild compatible solution | Avoid excessive heat and steam |
| Wood veneer | Dry dusting and minimal moisture | Avoid aggressive rubbing |
| Factory-finished cabinets | Manufacturer-approved cleaning product | Follow the specific finish instructions |

Remember: This table is a general guide, not a guarantee of compatibility. Factory coatings, adhesives, and protective treatments vary between manufacturers.
Natural Cleaning Solutions for Kitchen Cabinets
Many people prefer simple household cleaning ingredients. However, natural ingredients are not automatically safe for every cabinet finish.
Choose cleaning solutions based on the surface rather than assuming that a household ingredient is harmless.
Mild Dish Soap and Water
A small amount of mild dish soap in lukewarm water can help loosen everyday grease and dirt on compatible cabinet finishes.
Use a soft cloth and avoid applying too much liquid.
White Vinegar
White vinegar is acidic and should not be treated as a universal kitchen cabinet cleaner.
It may affect certain coatings, painted finishes, adhesives, and delicate surfaces.
Only use it if the cabinet manufacturer specifically confirms compatibility.
Never mix vinegar with bleach.
Baking Soda
Baking soda is sometimes recommended as a household cleaning ingredient.
However, it has mildly abrasive properties and can scratch or dull delicate cabinet finishes.
Avoid rubbing baking soda directly onto painted, glossy, or delicate surfaces unless the manufacturer specifically approves the method.
Warm Water and Microfiber Cloth
For light dust and everyday fingerprints, a microfiber cloth with minimal moisture may be sufficient.
This is a gentle starting point for many compatible surfaces.
Always dry the cabinet afterward, especially around edges and joints.
Kitchen Cabinet Cleaning Mistakes to Avoid
Even well-intentioned cleaning can damage kitchen cabinets if the wrong technique or product is used.
Avoid these common mistakes:
- Using excessive water: Moisture can penetrate wood, MDF, veneer, and cabinet joints.
- Using abrasive pads: These can scratch or dull protective coatings.
- Using steel wool: Metal fibers can damage finishes and leave marks.
- Applying undiluted vinegar: Acidic cleaners may affect certain finishes.
- Using harsh degreasers: Some products can strip coatings or discolor surfaces.
- Applying baking soda: Its abrasive texture may scratch delicate finishes.
- Ignoring manufacturer instructions: Different cabinet materials require different care.
- Leaving moisture around edges: Water can enter exposed joints and cause damage.
- Using excessive heat: Heat and steam may weaken thermofoil adhesives.
- Mixing cleaning chemicals: Combining household cleaners can create hazardous reactions.
- Skipping the hidden-area test: A cleaning product may cause visible damage.
- Using dirty cloths: Previously used cloths can transfer grease and dirt.
Important household cleaning safety warning
Never mix bleach with vinegar, ammonia, acids, or other cleaning products. Dangerous gases and chemical reactions may occur.
Always read product labels, follow the manufacturer’s instructions, and maintain suitable ventilation when using cleaning products.
Always read product labels, follow handling instructions, and avoid mixing cleaning products; see this guide to the safe use of household cleaning products
How Often Should You Clean Kitchen Cabinets?
A simple maintenance schedule can help prevent grease and dirt from accumulating.
Daily Kitchen Cabinet Maintenance
- Wipe fresh food splashes.
- Remove visible fingerprints.
- Clean grease splashes promptly.
- Keep handles clean.
- Dry accidental water spills.
Weekly Kitchen Cabinet Maintenance
- Wipe cabinet doors with an appropriate cloth.
- Clean handles and knobs.
- Remove surface dust.
- Check cabinet areas near the stove.
- Inspect cabinet edges for moisture.
Monthly Kitchen Cabinet Maintenance
- Perform a more detailed surface cleaning.
- Clean decorative details and corners.
- Inspect hinges and handles.
- Check for peeling, swelling, or finish damage.
- Clean cabinet interiors where necessary.
Adjust the schedule according to cooking habits, household usage, and manufacturer recommendations.
Include cabinet inspections in your monthly home maintenance checklist to identify water leaks, dampness, swelling, and other problems before they become more serious.
How to Prevent Kitchen Cabinets from Becoming Greasy
Prevention is easier than repeatedly removing stubborn grease.
Here are practical ways to keep cabinets cleaner.
- Use an exhaust fan: Run your range hood or exhaust fan while cooking to help remove airborne grease and moisture.
- Clean cooking splashes promptly: Do not allow fresh oil or food residue to accumulate.
- Keep cabinet handles clean: Regularly wipe frequently touched areas.
- Avoid touching doors with greasy hands: This reduces fingerprints and sticky marks.
- Clean the stovetop regularly: Prevent accumulated grease from spreading around the cooking area.
- Maintain kitchen ventilation: Proper ventilation helps reduce airborne cooking particles.
- Protect cabinet edges from moisture: Wipe spills immediately.
- Follow a cleaning schedule: Regular maintenance reduces the need for intensive cleaning.
Regularly cleaning kitchen surfaces, removing food residue, and maintaining good ventilation can also help you keep your kitchen clean and fresh.
Keeping cabinet interiors free from food crumbs and sticky spills can also help prevent ants from entering your kitchen.
When Should You Seek Professional Help?
Ordinary cleaning is not suitable for every cabinet problem.
Sometimes what appears to be stubborn dirt is actually damage to the cabinet material or protective finish.
Consider professional cabinet repair or restoration if you notice:
- Peeling laminate.
- Swollen wood or MDF panels.
- Damaged paint or clear coatings.
- Deep stains that remain after appropriate cleaning.
- Water damage.
- Discoloration caused by chemical exposure.
- Warped cabinet doors.
- Loose veneer or thermofoil layers.
Avoid attempting to repair these problems through aggressive scrubbing or stronger chemicals.
A cabinet restoration professional can assess whether the surface needs refinishing, repair, or replacement.
Frequently Asked Questions About Cleaning Kitchen Cabinets
1. What Is the Safest Way to Clean Kitchen Cabinets?
The safest starting point is a soft microfiber cloth and a small amount of mild cleaning solution compatible with the cabinet finish. Avoid excessive water, abrasive materials, and harsh chemicals. Always test the solution in a hidden area first.
2. How Do I Clean Kitchen Cabinets Without Removing the Finish?
Use gentle wiping rather than aggressive scrubbing. Identify the cabinet material, choose a compatible cleaner, and dry the surface immediately after cleaning.
3. Can I Use Vinegar to Clean Kitchen Cabinets?
Vinegar is not suitable for every cabinet finish. Its acidity may affect certain coatings, adhesives, and painted surfaces. Use it only when the manufacturer confirms compatibility.
4. Does Dish Soap Remove Grease from Kitchen Cabinets?
Yes, mild dish soap can help loosen everyday cooking grease on compatible finishes. Use a small amount mixed with lukewarm water and wipe gently with a soft cloth.
5. How Do I Clean Greasy Wooden Kitchen Cabinets?
Use a soft microfiber cloth and a mild cleaning solution approved for the wood finish. Avoid soaking the wood and dry the surface immediately.
6. Can Baking Soda Damage Kitchen Cabinet Finishes?
Yes. Baking soda can act as a mild abrasive and may scratch or dull delicate painted, glossy, or polished surfaces. Avoid using it unless the manufacturer approves it.
7. How Often Should Kitchen Cabinets Be Cleaned?
Wipe fresh spills and visible dirt as needed. Clean frequently touched areas weekly and perform a more detailed cabinet cleaning approximately monthly, adjusting the schedule to your kitchen usage.
8. What Should I Avoid When Cleaning Painted Cabinets?
Avoid steel wool, abrasive sponges, harsh degreasers, excessive moisture, and aggressive scrubbing. These can damage paint or affect its appearance.
9. How Do I Remove Sticky Residue from Cabinet Doors?
Start with a soft cloth lightly dampened with a compatible mild soap solution. Allow the moisture to loosen the residue briefly, then wipe gently. Use an approved cabinet cleaner if necessary.
10. Can I Use a Degreaser on Laminate Cabinets?
Only use a degreaser specifically confirmed as compatible with your laminate surface. Some chemical ingredients can damage laminate edges, adhesives, or decorative layers.
11. How Do I Clean Kitchen Cabinets Without Leaving Streaks?
Use a clean microfiber cloth, a small amount of compatible cleaning solution, and controlled moisture. Remove soap residue where appropriate and dry with a separate clean towel.
12. How Do I Protect Wooden Cabinets from Moisture?
Wipe spills immediately, avoid leaving wet cloths against cabinet doors, maintain proper kitchen ventilation, and inspect cabinet joints for signs of moisture damage.
Conclusion
Keeping kitchen cabinets clean does not require expensive products or aggressive scrubbing. The most important step is understanding your cabinet material and selecting a cleaning method that will not damage its protective finish.
Whether you have solid wood, painted, laminate, thermofoil, or veneer cabinets, gentle cleaning techniques can help remove everyday dirt, fingerprints, grease, and sticky residue.
Remember these essential practices:
- Identify your cabinet material before cleaning.
- Use mild, compatible cleaning solutions.
- Choose soft microfiber cloths and non-abrasive tools.
- Avoid excessive water and harsh chemicals.
- Test cleaning products in an inconspicuous area.
- Dry cabinet surfaces and edges thoroughly.
- Maintain a regular cleaning schedule.
Following these practical steps will help you understand how to clean kitchen cabinets without damaging the finish while keeping your kitchen looking fresh and well-maintained.
For more practical kitchen cleaning advice, DIY solutions, and home maintenance guides, explore more helpful articles on Fix The Annoying.